

Your mobile home furnace filter size depends on its filter rack, return arrangement and equipment instructions. Match all three dimensions, the filter material and the number of filter positions. The home’s brand or width won’t identify that combination.
A thin door pad, two separate framed filters and a deep media cartridge can each belong to a different system. Start by identifying what your installed equipment requires. An old filter provides a clue, but a previous owner may have fitted the wrong one.
Find the filter position before shopping by size
Look for the owner maintenance section in the furnace manual. Also check the instructions for an added cooling coil, return grille or separate filter cabinet. The filtration arrangement can depend on those accessories.
Return air is room air traveling back to the blower. The supply registers deliver heated or cooled air into rooms. A filter belongs in the approved return arrangement, rather than wherever a loose panel happens to fit.
Our guide to the home’s heating and cooling system explains those routes and their separate functions. Filter sizing is one part of that system check.
| What you find | What to identify | What would be a guess |
|---|---|---|
| A thin pad behind a louvered furnace door | The specified pad material, dimensions and original retaining arrangement | Buying a framed filter because its face dimensions look close |
| A framed filter in a door rack | Each rack’s required dimensions, quantity and permitted filter type | Assuming all filters with the same printed size are approved |
| A filter behind a wall or ceiling return grille | The grille model or specified filter size, plus whether other filter positions remain in use | Measuring the decorative grille’s outside trim |
| A separate media cabinet | The cabinet model, compatible cartridge identifier and actual cartridge dimensions | Ordering any filter described as four or five inches deep |
| No filter at the expected location | The actual installed return arrangement and applicable instructions | Adding a filter at the nearest opening or running without one |
Limit inspection to the filter access the instructions designate for owners. Shut down the equipment as those instructions require before removing a filter. A thermostat setting alone may not provide the required isolation.
Don’t open control panels, remove a blower or reach past a coil to hunt for a filter. If the label or filter position is inaccessible, ask a technician to identify it. Photograph accessible equipment labels and existing paperwork instead.
Separate filter positions aren’t necessarily spare positions
Some arrangements have more than one filter. Two openings can feed different return paths, with a filter required at each. Another arrangement may use an accessory that replaces an earlier filter location.
That distinction matters when you find both a door filter and another filter nearby. Count the locations shown in the applicable instructions. Don’t remove one or add another solely because an online photo looks similar.
Also distinguish separate required filters from filters stacked along the same air path. Adding a second filter behind the first changes the arrangement. It doesn’t turn the original rack into an approved filtration upgrade.
Measure your mobile home furnace filter size in three dimensions
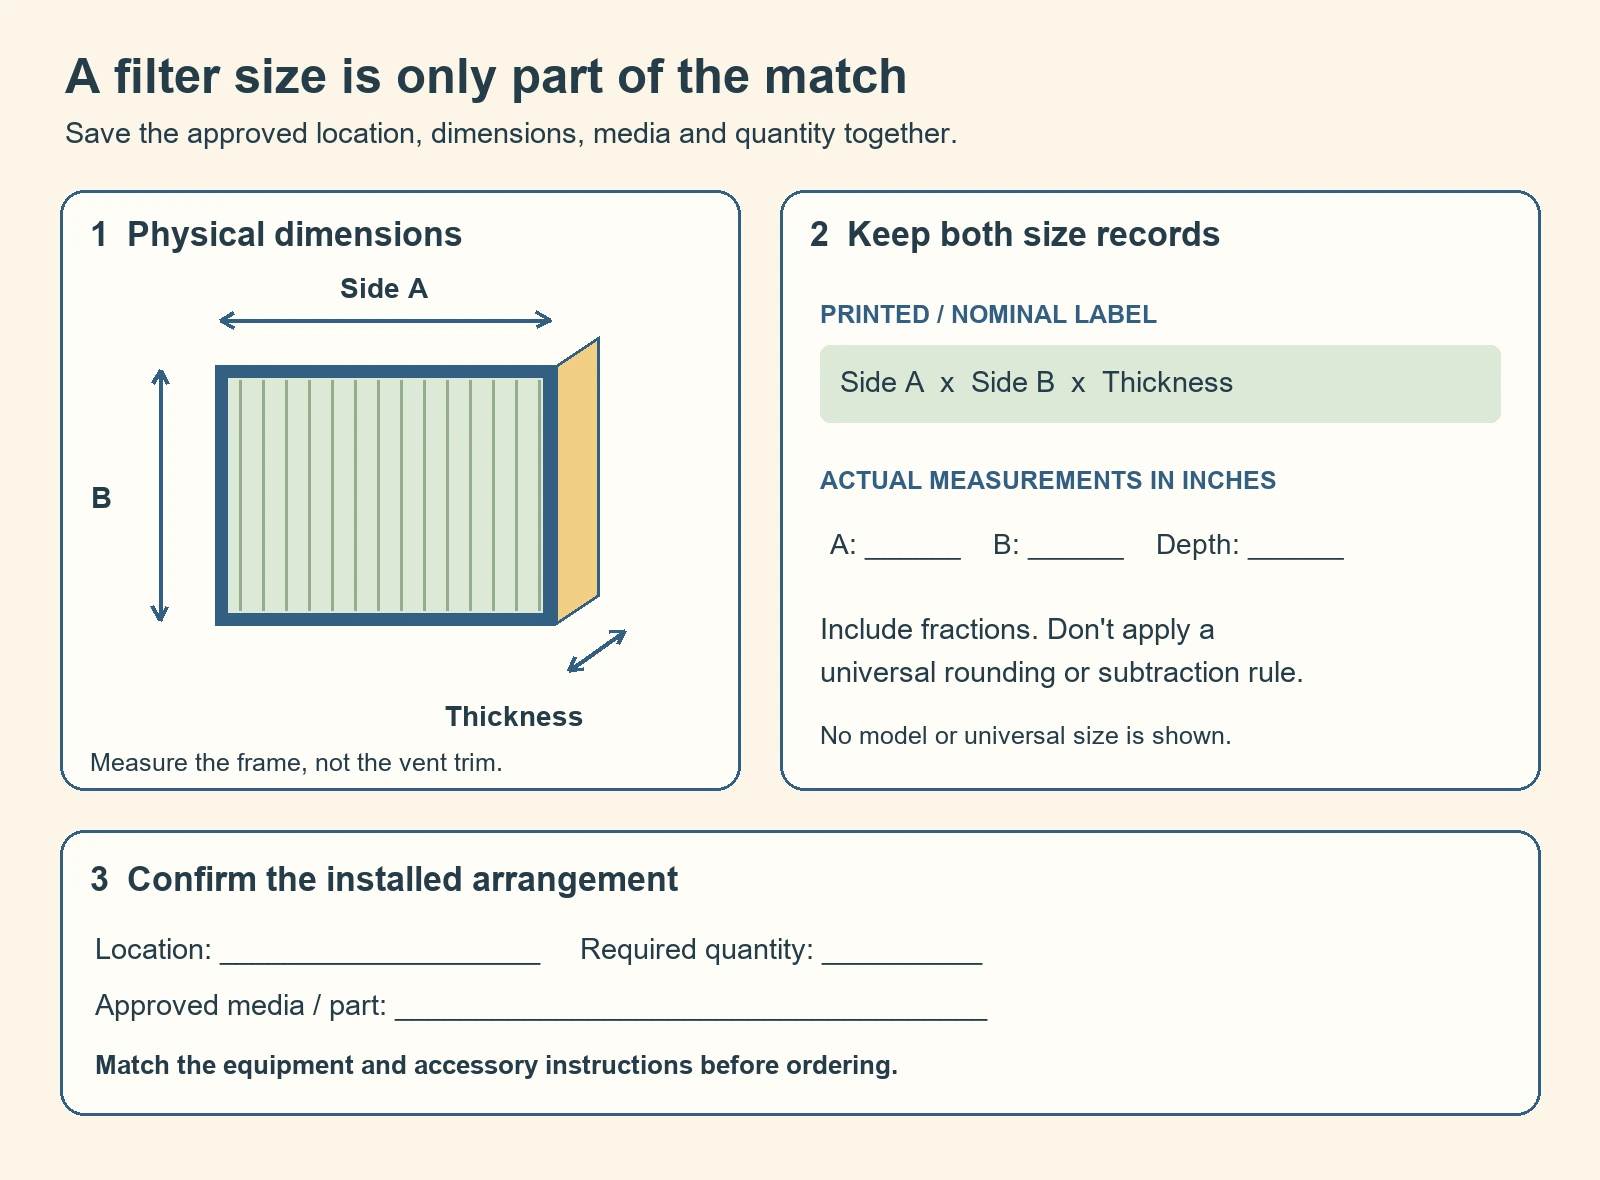
Keep the printed size and the measured size in separate fields. A nominal size is the product’s size label. Actual size describes the physical dimensions of that particular filter.
Nominal and actual dimensions can differ. There isn’t one subtraction rule that works for every brand, thickness and cabinet. For example, the manufacturer’s filter sizing FAQ specifically advises checking actual frame size when nominal descriptions differ.
- Photograph the existing filter’s full label before discarding it. Capture the size, part number, material and any airflow arrow.
- Measure both face dimensions of an undamaged framed filter, from outside edge to outside edge. Record fractions rather than rounding immediately.
- Measure its full thickness, including the frame. Keep that dimension separate from the two face measurements.
- Compare the result with the rack or cabinet’s specified replacement. Measure accessible support tracks only where the owner instructions permit.
- Check that the approved replacement seats correctly and its cover closes normally. A bent frame or an exposed bypass gap needs correction.
Label your notes clearly: side A, side B and thickness, all in inches. Sellers may put the face dimensions in a different order. Compare the physical rectangle and the specified orientation, rather than rejecting a listing because the first two numbers are reversed.
Don’t confuse the opening, support track and filter
The visible air opening may be smaller than the filter that overlaps it. The door’s outside dimensions may be larger than its filter supports. Neither measurement automatically describes the replacement media.
For a retained pad, identify the manufacturer’s media dimensions and how the retainers support it. Don’t stretch a short pad until it reaches the clips. Don’t use the vent opening as a cutting template unless the instructions specify that method.
A missing filter makes this distinction especially useful. Write down the opening dimensions, accessible support dimensions and rack identifiers as separate observations. Give those records to the manufacturer or technician to confirm the required filter.
A hypothetical measurement example
Suppose a framed filter carries a 16 x 20 x 1 label. Your tape records 15 1/2 x 19 1/2 x 3/4 inches. Those are two descriptions of the same hypothetical item, not proof that every 16 x 20 x 1 filter measures that way.
A replacement with that nominal label still needs compatible actual dimensions, material and approval for the rack. Don’t add an assumed half inch to every measurement. Don’t round a measured pad thickness into a framed filter category.
A verified furnace example shows why material matters
The Coleman DGAX manual provides a useful counterexample to universal filter advice. Its Air Filters section specifies two filters, each listed as 16 x 20 x 1. It also explicitly prohibits pleated filters in that furnace.
The current manufacturer’s DGAX product page links this DGAX owner manual, document 5483103, page 5. Its revision identifier ends in 1118. Read the full manual and match your equipment before applying its instructions.
| Exact documented application | Listed filter arrangement | Limit that stays with the size |
|---|---|---|
| DGAX furnace covered by that manual, using its internally mounted door rack | Two filters, each 16 x 20 x 1 inches | Same size and type; pleated filters expressly excluded |
This is a model and arrangement example, not a Coleman brand chart. It doesn’t establish the requirement for every Evcon, Miller, Intertherm or other manufactured home furnace. A replacement furnace or added filter cabinet also needs its own instructions.
Use the same method with your equipment: find the exact manual, locate its filter section and preserve every qualification beside the dimensions. If the document lists several arrangements, identify which one is installed. A size copied without that context is incomplete.
Choose the replacement type before comparing filtration ratings
Two filters can occupy similar space while behaving differently in the air stream. Material, construction and the approved support arrangement matter alongside size. Start with the equipment’s requirements rather than the highest number on the package.
| Filter description | Confirmation to obtain | Common mistake to avoid |
|---|---|---|
| Washable pad or mesh assembly | That this exact media is reusable, how to clean it and how it must dry | Assuming every flexible sheet or metal frame is washable |
| Disposable framed filter | The specified size, type, airflow direction and replacement interval | Washing media intended for disposal |
| Cuttable replacement media | Explicit permission to trim that product for the approved retaining arrangement | Cutting a framed cartridge or using general purpose foam |
| Deep media cartridge or refill | The cabinet and compatible replacement identifier, including the required frame | Treating nominal depth as universal cabinet compatibility |
A reusable frame doesn’t necessarily make its media reusable. Some systems accept replaceable inserts inside a retained frame. Record which part stays and which part gets replaced before ordering refills.
If you want better particle capture, first confirm whether the existing arrangement permits a change. MERV describes particle capture performance. It isn’t a fit certificate or an equipment approval.
The EPA’s MERV guidance qualifies higher efficiency choices by what the system fan and filter slot can accommodate. It advises consulting an HVAC technician when necessary. That qualification matters more than a generic recommendation to buy MERV 13.
Ask the technician to assess the proposed filter at the system’s required airflow. Have them confirm acceptable pressure drop, available filter area and equipment limits. Physical fit alone doesn’t establish that a denser filter is suitable.
A rack with an express filter type restriction needs that restriction respected. Don’t treat a lower MERV pleated product as an automatic exception. An approved cabinet modification is a separate project from replacing an existing filter.
Replace or clean only the owner serviceable filter
Have the confirmed replacement ready before removing the old filter. Read the equipment’s shutdown, filter access and restart instructions first. If the required procedure exceeds owner maintenance, arrange service.
Once the equipment is safely shut down, note how the old filter sits. Follow the replacement’s airflow arrow and the equipment instructions. Don’t infer airflow from whether the furnace heats downward or from the direction of the filter pleats.
Seat each required filter in its original approved support. Check the accessible retainers, frame and cover without reaching into the equipment. A missing clip, bent rack or cover that won’t close needs attention before operation.
For washable media, follow its cleaning directions and required drying time. For disposable media, use the specified new replacement. Don’t return damp media or substitute an unapproved household material.
Restore the covers before restarting as instructed. Don’t defeat a door switch to check airflow. If the system behaves abnormally afterward, shut it down according to its instructions and arrange assessment.
Use the equipment schedule, then respond to actual condition
A calendar reminder helps, but the right interval depends on the filter and equipment. Follow the applicable maintenance schedule and inspect more often when the instructions call for it. Construction dust deserves particular attention.
Record when you checked, cleaned or replaced the filter, plus its condition. An inspection date and a replacement date are different records. Don’t assume a filter is usable until the package’s advertised lifespan ends.
Keep remodeling debris out of the system through the contractor’s equipment protection plan. A replacement filter isn’t permission to circulate sanding dust through the home. Coordinate that protection before dusty work begins.
When the size seems right but the system still struggles
A correct mobile home furnace filter size won’t repair a damaged rack, blocked return or dirty coil. Record what changed and when the symptom began. Avoid diagnosing a motor or refrigerant problem from the filter’s appearance alone.
| Observation | Useful next check | What not to conclude |
|---|---|---|
| The new filter bows or the cover won’t close | Recheck actual dimensions, thickness and approved media; inspect accessible supports | That forcing the door will make it fit |
| Dust collects around an edge while the center stays clean | Ask for a seating and bypass check | That a clean looking filter proves clean equipment |
| Air delivery worsens after changing filter type | Give the technician both filter identifiers and the timing of the change | That operation without a filter is an acceptable fix |
| A filter becomes wet or nearby water appears | Stop and arrange equipment assessment under the applicable instructions | That a washable filter makes a water problem harmless |
| Cooling equipment develops ice | Arrange assessment of airflow and other possible causes | That filter size proves the cause or resolves refrigerant concerns |
The manufacturer’s filter and maintenance answers identify several possible causes of icing. Insufficient airflow is one possibility. Low refrigerant, coil condition and mechanical faults also require consideration.
Don’t chip ice from a coil, reach through a filter opening or repeatedly restart a unit that stops abnormally. Leave internal inspection and measurements to the technician. A helpful service request includes observations rather than a guessed component diagnosis.
If only certain rooms have weak delivery, the distribution path may need investigation too. Our ductwork guide separates supply, crossover and return problems. It explains why changing filter dimensions doesn’t resolve every comfort complaint.
Save an ordering record that survives the next filter change
Keep one record for each distinct filter position. Attach a label photo and a picture of its approved location. Store the record with the furnace documents so another household member can find it.
| Field | What to write down |
|---|---|
| Equipment identity | Furnace model and serial; cooling coil or cabinet model when relevant |
| Document match | Manual title, document identifier, revision and filter section |
| Position and quantity | Each required location and the number of filters at that location |
| Printed size | The complete nominal label, including thickness and units |
| Actual dimensions | Both outside face dimensions and thickness, including fractions |
| Type and identifier | Required media, reusable or disposable status, compatible part or cartridge number |
| Use limits | Material restrictions, cleaning instructions and any approved filtration rating |
| Condition and next check | Last inspection date, action taken and applicable inspection schedule |
When asking a supplier for help, send that record rather than just the home’s make and year. Ask them to confirm the actual dimensions and exact application. A listing that says it fits many mobile homes still needs an equipment match.
The broader parts compatibility guide explains the same principle for replacement components. The category name narrows your search; the documented application decides the fit.
Once the configuration is confirmed, save the replacement identifier with your mobile home furnace filter size. Future purchases become a check against a known record. If the equipment or filter cabinet changes, update that record before buying another pack.
Found a detail that needs checking? Tell us about a correction.