
Comparing mobile home parts vs regular house parts starts with compatibility. A familiar faucet or door handle may fit once its connections and dimensions match. A furnace or complete exterior door needs checks that go well beyond matching its visible size.
You don’t need to reject every ordinary house part. You do need to identify the assembly already installed and compare it with the replacement’s actual instructions. The words “mobile home” on a package don’t complete that comparison for you.
Mobile home parts vs regular house parts: what decides fit
Use four separate checks: dimensions, connections, installation details and suitability for the intended use. Passing one doesn’t cancel a failure in another. Treat any unanswered check as an unresolved purchase decision.
- Dimensions: Does the replacement fit the actual opening, mounting surface and available depth? Compare the measurements the manufacturer requests, rather than the nearest catalog size.
- Connections: Do the mounting points, pipe materials, threads or other interfaces match? An adapter needs approval for the exact connection it joins.
- Installation: Can the assembly be installed using its specified support, fastening, sealing and access arrangements? A change to surrounding construction belongs in the project assessment.
- Suitability: Do the instructions and any required listing cover this location and application? Check the exact model, not a similar item from the same brand.
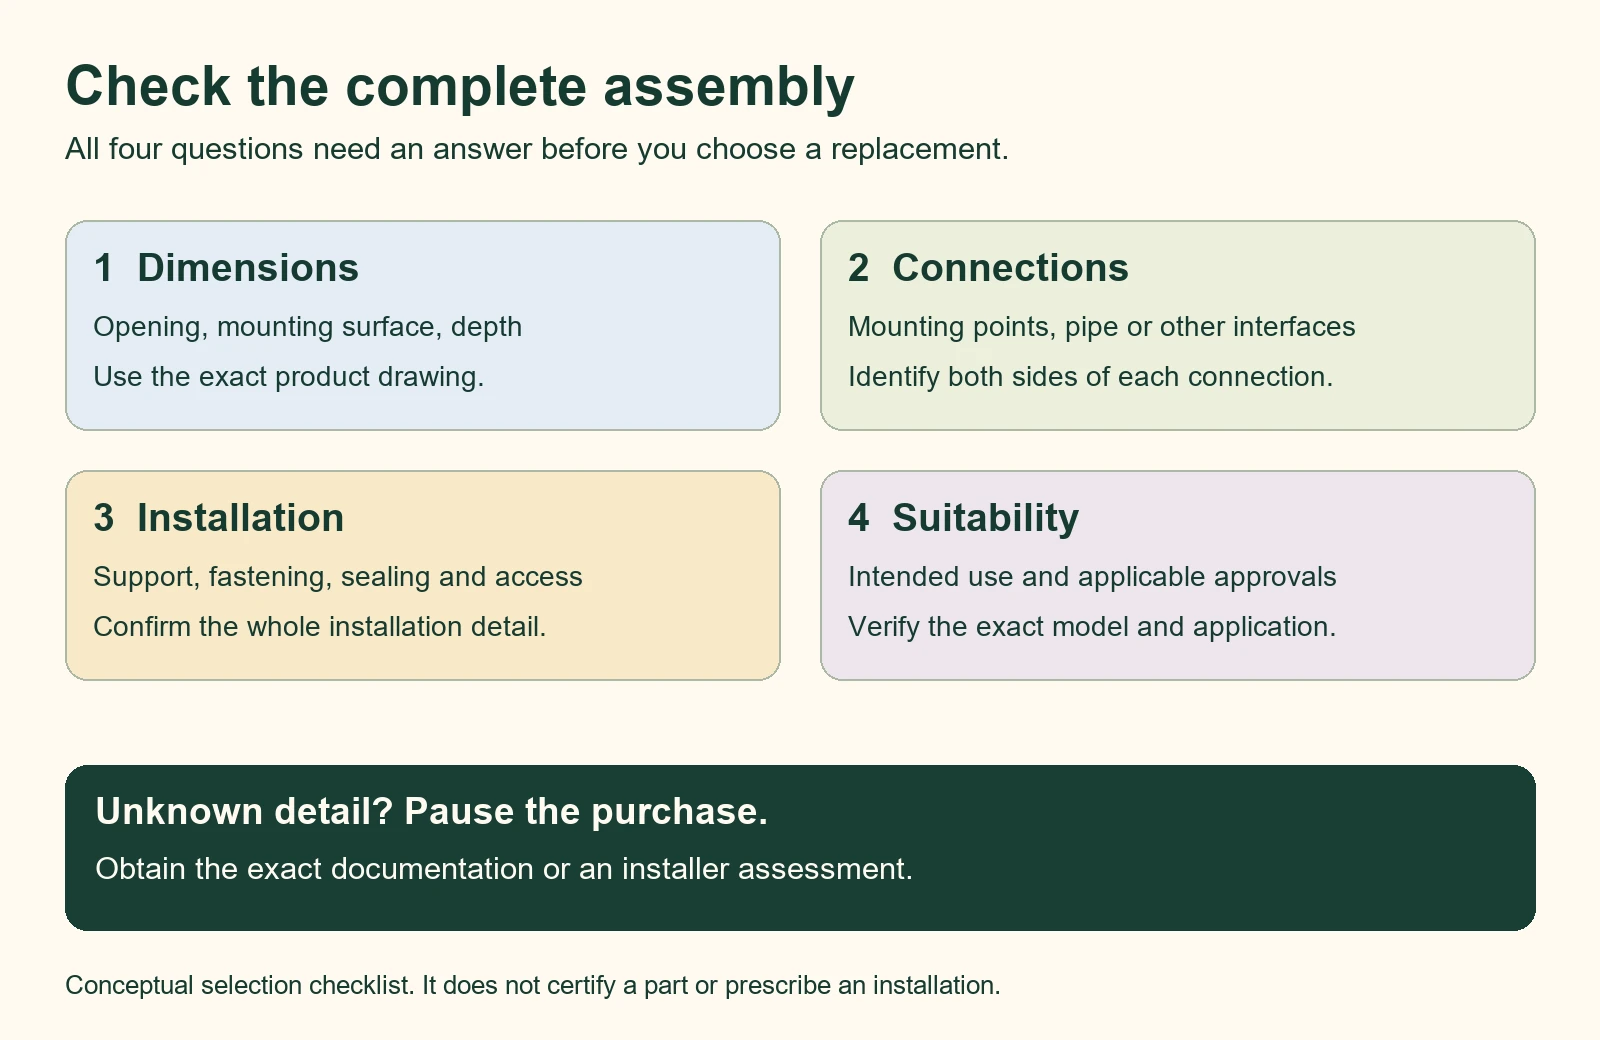
Think of these as four blanks on an order sheet. A seller’s confirmation that “the width is right” fills only part of the first blank. Ask what supports the other three before committing to a replacement.
Also separate the home from its installed equipment. The home’s identification can help locate records, but a faucet, furnace or window has its own identity. Replacing that component means researching the component as well as its surroundings.
Compare the assembly, one part at a time
This table is a starting checklist, not a universal fit chart. Its last column identifies the reason to pause or obtain more information. It doesn’t mean every listed part requires a specialty supplier.
| Assembly | Could an ordinary residential part work? | What must match or be confirmed? |
|---|---|---|
| Door handle or lock | Potentially, with the correct preparation and function | Door thickness, backset, holes, latch and strike; exit operation where applicable |
| Complete exterior door | A possible assessed replacement, never an assumption | Unit and opening dimensions, jamb depth, mounting method, swing, threshold and applicable door requirements |
| Window or window hardware | Potentially, for the identified window system | Actual opening, frame system, mounting, water management and any required emergency exit function |
| Sink faucet | Potentially | Mounting holes, spacing, mounting thickness, reach, underside clearance and supply connection type |
| Toilet | Potentially, after a complete fit assessment | Drain center location, finished wall measurement, footprint, supply, clearances and sound support |
| Tub or shower assembly | Potentially, if the complete installation fits | Alcove, drain location, support, access and compatible wall system |
| Water pipe fitting | Only for its documented pipe and joining system | Material markings, nominal size, fitting compatibility and installation instructions |
| Switch or receptacle | Appearance alone cannot decide | Existing device construction and wiring enclosure, applicable ratings and installation method |
| Furnace or water heater | Only when the exact application is covered | Listing, fuel or electrical supply, space, air and vent arrangements, connections and service access |
| Wall finish | Material options exist, but substitution needs assessment | Existing construction, fastening, finish thickness and any assembly requirements |
| Skirting panel or trim | Only if the parts form a compatible system | Panel profile, retaining trim, anchoring, access and ventilation provisions |
Doors and windows: the number on the label isn’t the opening
A door slab is the moving panel. A complete door unit includes its frame and other supplied components. The rough opening is the opening in the surrounding framing.
Keep those dimensions in separate boxes on your notes. Don’t compare a measured slab with a replacement’s rough opening requirement. Don’t use the outside edge of decorative trim as evidence of either measurement.
A residential replacement may be worth considering, but changing the opening changes the project. Before ordering, have the installer assess the frame, wall depth, mounting method and threshold. Any proposed framing alteration needs the appropriate review before work begins.
For windows, use the instructions for the exact series and mounting system. The manufacturer may distinguish flush mounting from recessed fin mounting. An older document found through search may cover a discontinued system.
The Lippert building products document index makes that distinction useful. It lists current door and window instructions alongside older documents marked obsolete or discontinued. Choose the document that matches the unit, then confirm any uncertainty with support.
An emergency exit window also has a safety function. Federal manufactured home construction standards address bedroom exit windows separately from ordinary windows. A matching outer frame doesn’t prove that the replacement preserves the required exit function.
The same caution applies to an exterior door. Current federal construction standards address door construction and lock operation, including operation from inside without a key. Have the replacement assessed against the requirements applicable to your home and proposed work.
That doesn’t make every existing older door a current compliant assembly. Nor does it mean today’s construction rule automatically answers every alteration question. Obtain the applicable replacement requirements before choosing a different door configuration.
A regular handle may fit when a regular door unit doesn’t
Hardware has its own dimensions. Backset is the distance from the door edge to the center of the handle or lock hole. Door thickness and hole preparation are separate checks.
For a concrete example, the Schlage Broadway passage lever lists two standard backsets: 2 3/8 inches and 2 3/4 inches. Its standard door thickness range is 1 3/8 inches through 1 3/4 inches. Those are specifications for that hardware, not a mobile home door standard.
If your measured door falls within those ranges, you still need to check the holes, latch, strike and intended function. A passage lever doesn’t become the correct exterior locking arrangement merely because it fits. Conversely, the home’s construction type doesn’t automatically rule out residential hardware.
Faucets and toilets: mounting fit and plumbing fit are different
A faucet can cover the holes in a sink and still have the wrong supply connections. It can also connect to the supply and leave too little space for its handle or drain lift rod. Check both sides of the sink before deciding it fits.
Record the number of mounting holes and their spacing. Include the mounting surface thickness and clearance behind and beneath the faucet. Compare those observations with the new model’s specification drawing.
Moen’s lavatory selection guidance distinguishes a 4 inch centerset configuration from a widespread configuration. It also calls for checking clearance behind a drain lift rod. That is a mounting question, independent of the home’s label.
The supply side needs another comparison. The same manufacturer documents models with 3/8 inch compression supplies and models with 1/2 inch IPS connections. The manufacturer directs owners to identify the model before choosing an adapter.
Write down the connection type as well as the size. “Half inch” alone isn’t a complete description of a fitting. If you cannot identify the existing connection, take clear photographs and get it identified before ordering connecting parts.
Measure a toilet from the finished wall
For a toilet, rough in describes the distance from the finished wall to the drain center. The manufacturer’s measurement guidance excludes decorative baseboard trim. That reference point matters when comparing the room with a manufacturer’s drawing.
Also compare the new toilet’s overall projection into the room and its supply location. Keep the door swing and usable space in the assessment. A drain position match isn’t a complete room fit check.
Don’t treat a new fixture as a repair for a moving or damaged floor. If the existing toilet rocks or the surrounding floor is soft, have the support and flange assessed first. Choosing another bowl doesn’t resolve an unknown condition beneath it.
Nor does a replacement tank valve establish compatibility for a whole toilet. Those are different assemblies with different fit questions. Match the task to the evidence: internal tank part, complete toilet or floor and flange repair.
The doors and windows planning guide helps separate component repairs from full opening work.
Tubs and shower parts: compare the complete space
There isn’t one tub dimension you can safely assign to every mobile home. Measure the installed alcove and identify the existing drain arrangement. Ask whether the replacement drawing describes its overall size, required alcove or finished bathing area.
A manufacturer example shows why the complete drawing matters. Mustee’s T6030L-AFD tub is specified for a 30 x 60 inch alcove and a left drain. Its raised bottom accommodates an above floor drain arrangement.
That example isn’t a recommendation for your bathroom. It shows that drain arrangement and support belong in the comparison alongside length and width. The same nominal footprint doesn’t settle those details.
Check the wall system separately. The tub manufacturer identifies compatible wall products, but that doesn’t make every surround interchangeable. A selected surround must also suit the actual wall condition and installation method.
Ask the installer to check the route into the bathroom, access for connections and required support. Include any proposed changes in the assessment before ordering. A replacement that requires moving walls or drains belongs in a larger project scope.
Pipe fittings: identify the material before buying the connector
Plumbing is where mobile home parts vs regular house parts becomes a misleading shopping distinction. The useful question is which pipe material and joining system you have. The connector’s documented compatibility decides whether it belongs on that pipe.
Find readable pipe markings where safely accessible. Photograph the lettering, the existing fitting and the surrounding connection. Don’t decide that every flexible line is PEX, or that color alone identifies a pipe.
Polybutylene, often abbreviated PB, needs particular attention during a transition to another material. SharkBite’s transition documentation distinguishes the PB end from ends intended for other pipe types. Its ordinary coupling and its PB transition fitting aren’t interchangeable just because the catalog sizes look similar.
The manufacturer’s transition fitting guide identifies a gray collar for the PB connection. It identifies a tan collar for the listed compatible copper tube size materials. These are that manufacturer’s connection rules, not a universal color code for plumbing.
A correct transition fitting also needs installation according to its current instructions. This overview doesn’t specify insertion depths or provide a pipe repair procedure. Those details depend on the selected fitting and actual pipe condition.
If you have several materials from earlier repairs, document each connection being changed. Matching one end doesn’t verify the other. If the line is unmarked or deteriorated, get it identified and assessed before selecting a repair.
Electrical devices: a familiar face can hide a different assembly
A standard looking switch or receptacle doesn’t tell you how the wiring is enclosed behind it. Hubbell’s Wirecon range includes self contained devices intended for manufactured structures. The manufacturer describes their appearance as identical to ordinary switches and receptacles.
That makes a photograph of the front an incomplete identification record. Don’t assume a conventional replacement device is a direct swap. Have an electrician identify the existing device construction and determine the correct replacement method.
If a change needs a different enclosure or other wiring work, include that work in the project. Confirm the selected parts and method together. This isn’t a reason to improvise connections behind a cover plate.
You can help without opening energized equipment. Save any existing part information and photograph visible damage from a safe location. Leave wiring identification, device removal and electrical replacement to a qualified person.
Furnaces and water heaters: physical fit isn’t approval
For equipment, a matching cabinet size or capacity doesn’t establish a suitable replacement. The installation must work as a system. Connections, service space, air supply and venting can decide the selection.
The federal manufactured home construction standard, 24 CFR 3280.709, addresses appliance listings and manufacturer instructions. It also addresses combustion separation for specified fuel burning appliances. Those requirements explain why a generic residential label isn’t enough evidence for a proposed installation.
For a replacement project, ask the qualified installer to identify the applicable requirements and the model’s permitted application. Don’t assume every construction provision answers how alterations are regulated where you live. Keep the actual installation manual with the quotation.
A specific water heater example makes the distinction clear. Bradford White’s manufactured home atmospheric vent gas specification requires separation of the combustion and venting system from the dwelling interior. The corresponding specification sheet says it isn’t approved where a direct vent or sealed combustion system is required.
So even “manufactured home gas water heater” isn’t a complete compatibility answer. Two products within that broad category can require different arrangements. Don’t substitute one venting approach for another to make a replacement fit.
For a furnace, record the full model number and fuel or electrical supply information available on existing labels. Ask the contractor to verify the approved installation configuration, air system and connections. A capacity number alone can’t answer those questions.
Keep this decision with the installer if it involves gas, venting or electrical changes. Don’t buy equipment first and expect incompatible surroundings to be adjusted later. Obtain a complete installation proposal that names the equipment and necessary associated work.
Walls, seals and skirting: the material is part of a system
Not every wall in a manufactured home has the same finish. One home manufacturer describes both finished drywall and covered wallboards in its construction process. Don’t infer the panel type or thickness solely from the home’s age or appearance.
For a repair, identify the existing material and how the replacement will be supported and finished. Compare the panel thickness and the edges it meets. If the proposed change affects the wall assembly, get its requirements checked before substituting materials.
The same principle applies to sealing around an opening. A familiar sealant or flashing product needs to suit the materials and installation detail. The appropriate instructions describe how the opening joins the surrounding weather protection.
A tube of sealant isn’t evidence that a different window or door installation will work. Review the whole detail first. Confirm substrate compatibility and the specified sealing or flashing method with the selected system’s manufacturer.
Skirting also uses coordinated parts. Style Crest describes panel and trim components working together, including a retaining top trim. Similar color or panel height doesn’t prove another panel will engage the existing track correctly.
Record vented and solid panels separately when identifying the existing system. The Valor range includes both configurations. Ask the installer to confirm how replacement components preserve the assessed ventilation and access arrangements.
Decide whether you’re replacing a part or changing the installation
A replacement follows the existing installation only when the new component’s requirements actually match it. An alteration changes something the replacement depends on. Examples include reframing an opening, changing venting or changing the electrical installation.
Use those differences to describe the work clearly when seeking advice. Ask the responsible manufactured housing or building authority which requirements and approvals apply. Don’t rely on a nationwide claim that every small repair is exempt.
California provides a useful example of why specificity matters. Its alteration guidelines distinguish types of work and identify conditions involving openings, framing and bedroom exit windows. Those California instructions shouldn’t be treated as permit rules for another state.
There is also a practical purchasing difference. A part that matches the existing installation can be evaluated against known interfaces. A conversion needs the complete proposed installation settled before its components can be selected confidently.
Build a parts record before asking whether something fits
When comparing mobile home parts vs regular house parts, a short evidence packet is more useful than the home’s year alone. Prepare one for the specific assembly. Leave unknown measurements clearly marked as unknown.
- Identity: Record the component manufacturer, complete model and any readable part number. Add the home’s identifying information if you need factory records.
- Pictures: Show the whole assembly, visible labels and accessible mounting or connection details. Include the surrounding space that may limit a replacement.
- Measurements: Name each reference point and unit. Write “finished wall to drain center” or “door slab thickness” instead of an unlabeled number.
- Replacement documents: Save the exact specification and current installation instructions. Note the series or revision so a similar document doesn’t get substituted later.
- Unresolved changes: List anything that may need reframing, different connections, support or trade work. Resolve it before treating the part as a direct replacement.
Send that packet with a precise question: “Does this exact model suit these measurements and this installation?” Ask the seller or manufacturer to identify any missing information. Save the written response with the model number being discussed.
If the reply says only “fits mobile homes,” ask for the relevant drawing or instructions. If the old part is discontinued, ask for a documented replacement or conversion route. A visually similar item isn’t a confirmed superseding part.
Finally, check the seller’s actual return conditions before ordering or modifying a part. Keep the packaging and supplied documents until the fit decision is complete. Don’t remove or alter a functioning assembly merely to make an uncertain purchase seem necessary.
Three fit decisions that lead to different next steps
The faucet fits the sink, but its supply doesn’t match
Keep the mounting decision separate from the connection decision. Identify both supply ends and ask for the correct documented connection or adapter. You may be able to use the faucet without changing the sink, but that needs confirmation.
The replacement door has the same advertised width
Ask which width the listing describes: slab, complete unit or required opening. Then compare height, depth, mounting and the applicable door requirements. If framing changes are needed, have the whole replacement assessed before ordering.
The heater fits the compartment, but the vent arrangement differs
Stop treating it as a size match. Have the installer verify the listing, instructions and permitted installation. Choose equipment for that confirmed installation, rather than modifying the air or vent system around an unsuitable purchase.
These examples lead to different answers because compatibility belongs to the exact assembly. Keep the measurements, interfaces and instructions together. That gives you a defensible reason to choose an ordinary residential part, a specialty replacement or a professionally planned conversion.
Found a detail that needs checking? Tell us about a correction.