
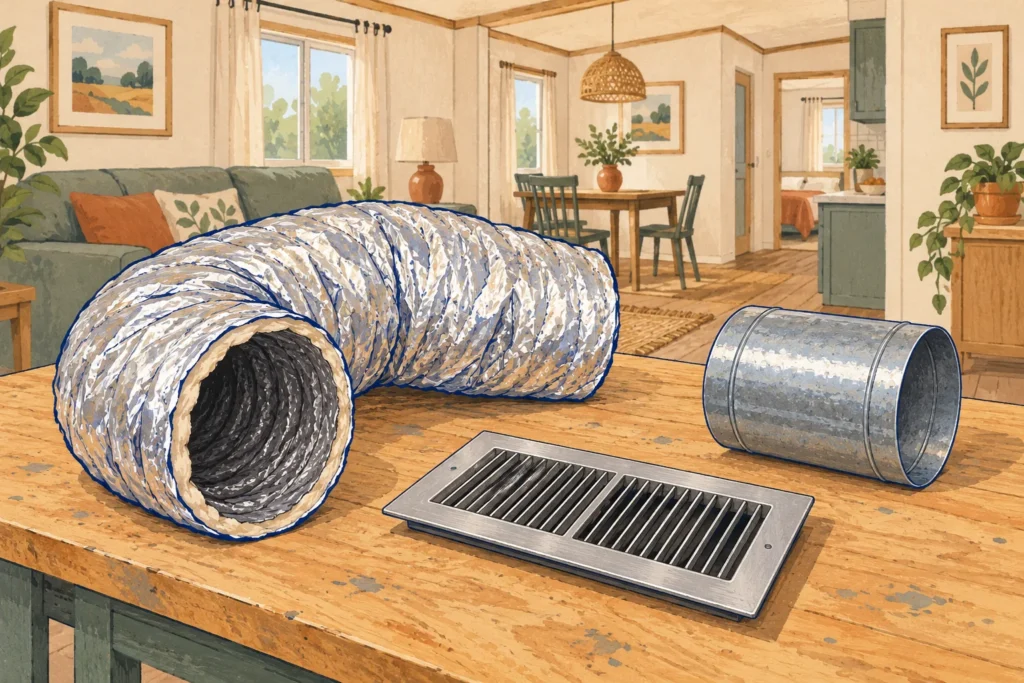
Mobile home ductwork has two jobs: deliver conditioned air to rooms and let room air return to the equipment. Before replacing a weak room’s register, find which part of that circuit is failing. A loose connection, crushed duct and blocked return route need different repairs.
Start with the pattern inside the home. Write down which rooms changed, whether doors affect comfort, and whether the problem began suddenly. That record helps an HVAC contractor investigate the right section instead of selling a larger system to overcome an unidentified restriction.
Map your mobile home ductwork before buying parts
A duct system isn’t necessarily a collection of round tubes beneath the home. Some runs are built into the floor assembly. Others connect an outdoor unit or join the air systems in separate home sections.
Use the home’s installation documents and equipment instructions to identify the arrangement. A sketch showing room names, registers and equipment locations is useful even when most ducts remain concealed. Mark hidden routes as unknown rather than drawing connections you haven’t confirmed.
| Part | What it does | What to record |
|---|---|---|
| Supply trunk | Carries conditioned air along a main route. | Which group of rooms it serves. |
| Branch and register boot | Connect a main route to a room outlet; the boot is the fitting behind the register. | Room, outlet location and visible condition. |
| Crossover | Joins distribution ductwork across home sections when the design requires it. | Documented connection points and accessible inspection photographs. |
| Supply register | Directs air into a room, often through an adjustable damper. | Whether furniture or a closed damper obstructs it. |
| Return grille or return passage | Provides a route back toward the air handler. | Location, filter arrangement and obstructions. |
| Transfer opening | Lets air leave a room for a central return when its door is closed. | Whether an existing opening was covered or altered. |
A home with floor supplies may have a central return near the equipment. It doesn’t automatically have a separate return duct beneath every room. Also, a double wide doesn’t always have a visible flexible crossover hanging beneath its center.
Initial installation standards recognize crossovers within floors or ceilings as well as exposed connections. The federal duct connection requirements explain these arrangements. They aren’t a substitute for the instructions belonging to your home.
The bottom closure is a separate layer
The broad protective material beneath the floor is often called belly board, bottom board or bottom closure. It isn’t the air passage itself. A damaged closure and a damaged duct can occur together, but patching one doesn’t establish that the other is sound.
Ask an inspector to photograph both layers separately. A duct repair needs an airtight air passage. The surrounding insulation and bottom closure also need a documented restoration plan if the work disturbs them.
Don’t remove the whole underside just to find an unconfirmed leak. Have the contractor explain the proposed access location, concealed hazards and final closure repair first. Broad removal may be justified by extensive damage, but it needs evidence.
Start with where the airflow changed
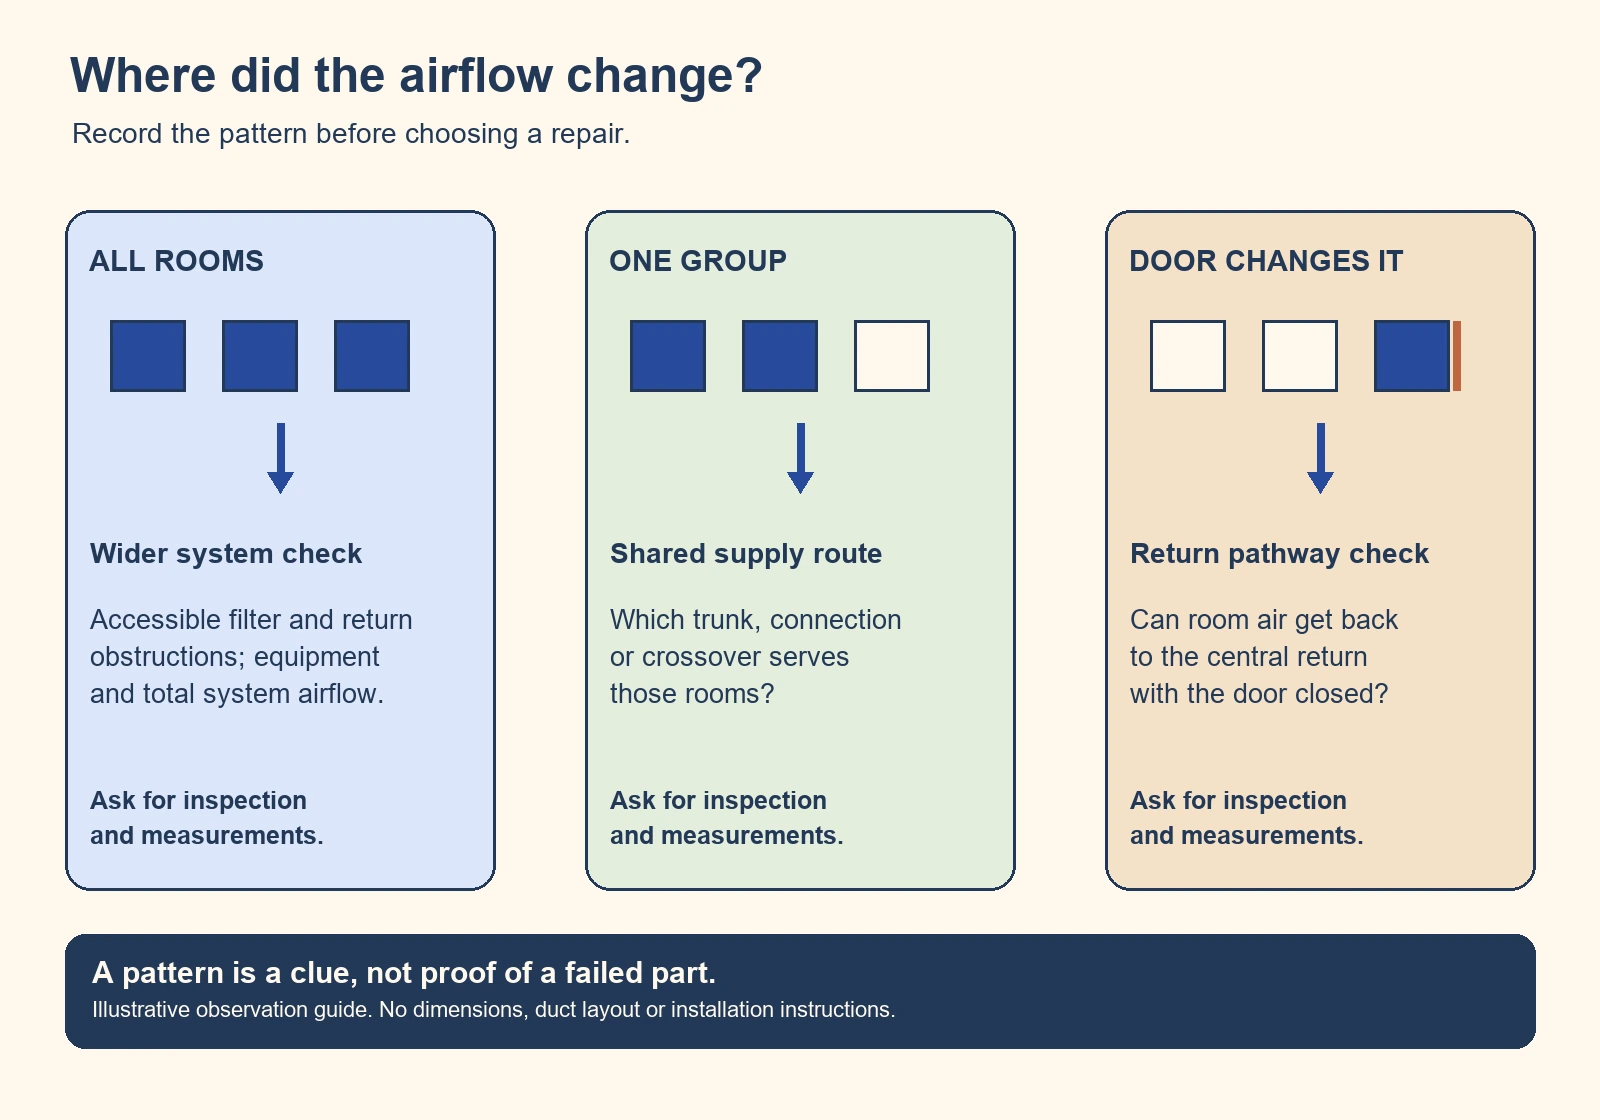
Room patterns help organize an inspection; they don’t prove a particular failed part. Keep the thermostat setting, operating mode and door positions in your notes. Comparing a heating observation with a cooling observation from another day can otherwise create a misleading picture.
| Pattern you notice | Useful next check | What it doesn’t establish |
|---|---|---|
| Every room feels weaker. | Check accessible filters and return obstructions; arrange equipment and system airflow assessment. | That every duct needs replacement. |
| One section or adjacent group changed suddenly. | Ask for inspection of the common supply route and any crossover serving that group. | That a crossover exists there or is the only possible cause. |
| Only one outlet seems weak. | Record its damper position, nearby obstructions and branch or boot condition. | That enlarging the register will solve it. |
| A bedroom gets uncomfortable with its door closed. | Have its return pathway and room pressure checked. | That the supply duct is undersized. |
| Air moves, but the room remains uncomfortable. | Ask about delivered air temperature, room load and building leaks. | That the duct is delivering the required airflow. |
Use “weaker than the other bedroom” as an observation, not a measured airflow result. A hand over a register can’t quantify cubic feet per minute, usually abbreviated CFM. A professional measurement can separate a delivery problem from a room that needs more heating or cooling.
For a hypothetical example, suppose three rooms in one home section lose airflow overnight. Start by asking which connection those rooms share. Don’t approve three separate branch replacements before the shared route has been inspected.
Now suppose that only one bedroom changes when its door closes. That pattern calls attention to the route air takes back out of the room. It still requires inspection and measurement before anyone cuts a door or wall.
Check the return route as carefully as the supply
A room can receive supply air yet struggle to pass that air back toward a central return. Furniture, a rug or a later alteration can obstruct an existing pathway. A new door or new flooring can also change the clearance of an intended opening.
Look for existing return grilles, transfer grilles and clear routes into the hall. Don’t cover a louvered equipment closet door to reduce noise. Have its intended airflow and equipment requirements checked before changing it.
Opening a bedroom door temporarily can be a useful comparison to record. Leave all other conditions as similar as practical. A change is a clue for a room pressure assessment, not permission to improvise a new opening.
Return improvements can use several designs, including dedicated ducts or transfer pathways. Selection needs the actual room airflow and available free opening area. A grille’s outside dimensions don’t tell you how much open area its blades provide.
Observe accessible areas without opening the home blindly
You can begin inside with the system off. Clear furniture from registers and returns, note existing damper positions, and inspect accessible grilles for obvious damage. Service the filter only by the equipment instructions; don’t remove equipment panels to search for a second filter.
Photograph labels and visible connections from safe access points. Never enter an area with standing water, exposed wiring, unstable supports or animal activity. Don’t squeeze under a home without a safe access arrangement or move supports to make room.
Keep sharp tools away from concealed floor cavities. Wires, plumbing and structural components may share that area. Cutting the belly material before identifying the duct route can create a second repair without locating the first problem.
If an existing plumbing leak has soaked the floor assembly, deal with its source alongside the duct work. The water line repair guide explains how to identify the supply repair scope. Duct sealing doesn’t stop water entering from a separate pipe.
Also distinguish duct symptoms from plumbing vent problems. A drain air valve, a bathroom exhaust fan and an HVAC return have different functions. A pipe or grille shouldn’t be connected to another system simply because both move air.
Outdoor air ventilation brings outside air into the home through its intended system. A return route mainly recirculates room air; it doesn’t by itself establish adequate outdoor ventilation. Combustion air serves fuel burning equipment, while its exhaust route carries combustion products outside.
Have unfamiliar hoses and openings identified before blocking or rerouting them. An HVAC air distribution repair should preserve the separate ventilation and appliance functions. A draft at an opening isn’t enough information to decide that it should be sealed.
Inspect the air passage, insulation and outer jacket separately
For flexible duct, ask for inspection of three functional layers. The inner core carries air. Insulation limits heat transfer, while the outer jacket helps protect that insulation and control moisture exposure.
An intact outer jacket doesn’t prove that the inner core remains attached at a collar. Likewise, wrapping an exposed inner core doesn’t recreate a complete insulated connection. Photographs should show the actual fault rather than only the finished covering.
A repair proposal should identify whether damage affects the jacket alone, the core, the insulation or multiple layers. Have wet material and the moisture source assessed before wrapping everything closed. A clean outer appearance isn’t a completion test.
Support should preserve the duct’s shape
Look for a flattened bend, a narrow strap digging into the duct or excess length folded into loops. These are conditions to document for correction. Pulling a duct tight between two collars isn’t a substitute for a proper support arrangement.
The manufacturer’s flexible duct installation guide illustrates compression, bends and support problems. Its guidance distinguishes damage to the jacket from damage to the core. The exact duct’s own listing and instructions still govern its installation.
Don’t use a generic strap spacing from a photograph as your installation plan. The installer needs the relevant support rules, permitted attachment points and route clearances. Request a finished photo that shows the full repaired span, including both connections and supports.
Keep the diagnosis specific. “Duct hanging low” might describe inadequate support, excessive length or a failed attachment. Those conditions can require different work, even when the same sag appears in an initial photo.
A sealed jacket doesn’t secure a joint
A joint needs the specified mechanical connection as well as its air seal. Ask which core fastener and closure system the installer will use. An outer wrap alone shouldn’t be described as reconnecting a detached air passage.
Use products identified for the duct material and application. General purpose cloth tape isn’t a substitute for an appropriate duct closure system. A product sold as foil tape still needs the relevant listing and suitable surface conditions.
Don’t transfer a metal duct fastening detail to a flexible inner core. Those assemblies can require different methods. The written scope should name the actual materials rather than promise “tape all joints.”
Choose replacement ductwork by the system, not the home label
There is no single diameter that fits every mobile home ductwork repair. Record the existing identified size, connection shape, route and equipment information. Then have the contractor confirm whether the original size remains appropriate.
Copying a crushed or poorly performing installation can preserve its problem. Moving a run, adding bends or changing equipment can also change the design question. A larger diameter isn’t automatically an approved improvement if its collars and surrounding system remain unchanged.
Before ordering, ask for these details in writing:
- The exact air duct product, size and listing, including whether exterior use is permitted.
- Its insulation value and jacket requirements for the actual location.
- Matching collars, transitions, core fasteners and closure materials.
- A supported route that avoids compression, ground contact and interference with other services.
- The equipment airflow requirements and measurements used to accept the completed work.
An air duct and an air connector aren’t interchangeable product descriptions. Confirm the printed designation instead of relying on a store category. Nor does a black jacket alone establish the right insulation value, listing or fit.
The current manufactured housing circulating air standard prohibits air connectors for exterior manufactured home duct connections. It also specifies R-8 insulation for directly exposed supply and return ducts, fittings and crossover plenums, with a basement exception. Its exterior provisions include vapor protection and suitable listing.
Those are current construction requirements, not a blanket ruling on every older repair. Initial setup has its own installation requirements. For an existing home, ask the installer which manufacturer instructions and local alteration requirements apply before selecting materials.
Don’t accept a seller’s broad “HUD compatible” phrase as the entire answer. Ask what the exact product label says and how it meets this installation. Our parts compatibility guide explains why the home category alone can’t establish fit.
Repair a section or replace the duct system?
A localized defect doesn’t automatically justify complete replacement. Ask whether the remaining material is intact, accessible and suitable for the intended repair method. The answer should include the core and connections, not just the visible outer covering.
A broader replacement assessment makes sense when inspection finds widespread damage or an unsuitable layout. Ask for evidence showing where the damage continues. “It’s old” doesn’t distinguish a sound concealed trunk from multiple failing flexible runs.
Keep duct condition separate from the equipment decision. A disconnected crossover can waste the output of otherwise functioning equipment. Conversely, replacing ducts won’t repair a failed blower, dirty coil or other equipment fault.
A useful proposal can include separate prices for the confirmed local repair and any justified broader work. Ask what each option leaves unresolved. That makes it easier to compare the consequences rather than just the total.
Cleaning isn’t a repair for a leak
Dust at a register doesn’t establish that all ducts need cleaning. Cleaning also doesn’t reconnect a joint or correct a crushed route. Require a description of the actual contamination and material before approving that service.
Wet or visibly moldy fiberglass duct material needs a different response from loose surface dust. EPA guidance recommends replacement of that affected material and correction of the moisture problem. Don’t approve a coating or fragrance as a substitute for finding why it became wet.
If contamination is part of the inspection, ask to see the affected area and have its extent documented. Don’t identify mold from color alone. Keep cleaning, material replacement and moisture correction as separate items in the work order.
Make the repair quote include proof of improvement
A good mobile home ductwork quote identifies the fault, access work, materials and acceptance checks. A list of duct lengths and tape rolls doesn’t explain the result you’re buying. Request an itemized scope before comparing bids.
| Quote item | Useful detail to request |
|---|---|
| Confirmed defect | Room or home section served, photographs, and what inspection found. |
| Access and restoration | Who opens and restores bottom closure, insulation, skirting or interior finishes. |
| Actual repair | Core connections, sealing, insulation, jacket and supports specified separately. |
| Design changes | Why a size or route changes and how equipment requirements were checked. |
| Measurements | Relevant airflow, pressure or leakage results before and after work. |
| Completion | Final photos, restored access closures and any unresolved equipment or moisture issues. |
Ask the contractor to explain the proposed measurements in plain language. Register airflow describes delivery to a room. Static pressure describes resistance at specified system locations; a leakage test addresses air escaping through the duct assembly.
These measurements answer different questions, so their numbers aren’t interchangeable. Test locations, operating mode and equipment limits belong with the result. Don’t compare a bare pressure number with an online “normal” value from another system.
After sealing, the contractor should evaluate airflow and consider combustion safety where fuel burning appliances are present. Changes to air movement can affect those appliances. Don’t alter combustion air openings or exhaust venting to improve a return route.
Keep your original room notes for the final walkthrough. Revisit the affected rooms under comparable conditions and ask about any remaining difference. The useful outcome is a documented repair and an explained result, not merely a new duct hidden beneath the home.
Found a detail that needs checking? Tell us about a correction.