
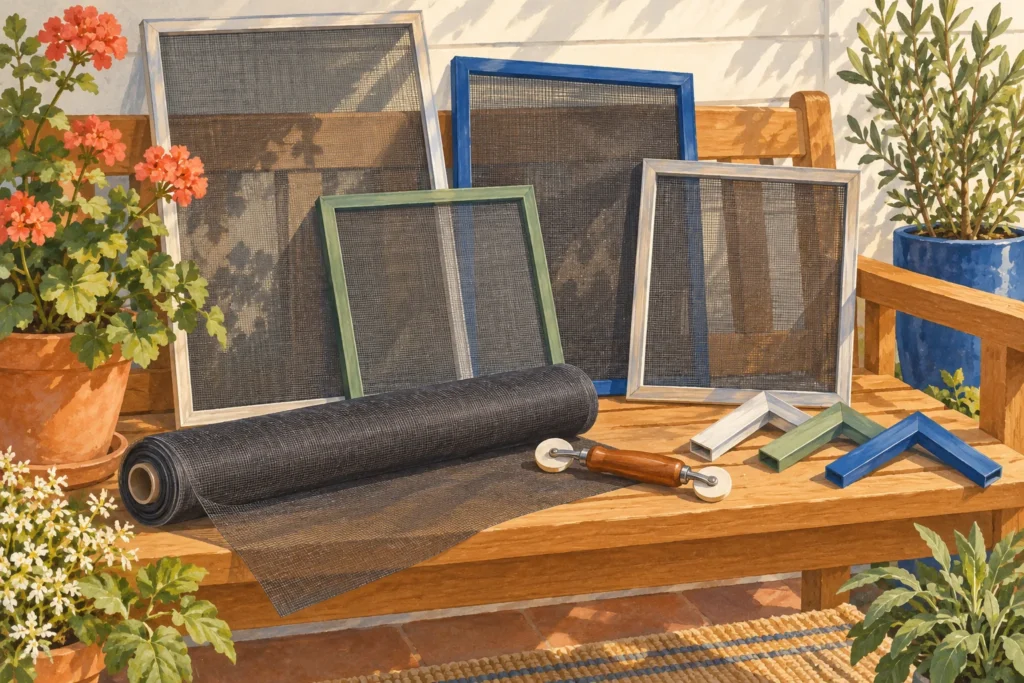
Screens for mobile home windows need to match the screen frame, its retaining hardware and the window’s receiving channel. The size printed on a replacement window doesn’t establish any of those details. If your existing frame is straight and fits securely, replacing its mesh may be all you need.
Start by deciding what failed: the fabric, a corner, the frame itself or the hardware holding it in place. Those lead to different shopping lists. Our door and window repair overview helps distinguish the surrounding components.
Which screens for mobile home windows should you buy?
Choose between repairing your existing screen, building a matching replacement and ordering a complete custom screen. A generic kit can work when its profile and retention system match. The words mobile home on a package don’t establish that match.
| What you find | Most useful purchase route | Confirm before ordering |
|---|---|---|
| Small isolated hole; surrounding mesh sound | A compatible screen patch | Patch material, attachment and acceptable appearance |
| Several tears; straight frame that already fits | Replacement mesh and suitable spline | Groove shape, spline diameter and new mesh thickness |
| Broken corner; rails otherwise reusable | Exact matching corner inserts | Frame cross section, corner legs and connection style |
| Bent rails or unusable groove | Matching frame components or a complete screen | Finished dimensions, profile and retaining hardware |
| Screen missing entirely | Manufacturer replacement or measured custom assembly | Window identity, receiving channels and installation clearance |
| Screen fits but falls out | Diagnose the retention system first | Missing springs, incorrect clips, latch engagement and frame distortion |
A small patch is reasonable when the surrounding fabric can support it. Multiple brittle areas make a full rescreen more sensible. Neither repair addresses a cracked corner or a missing retaining clip.
A complete window replacement belongs to a different decision. If the glass, sash or wall connection is failing, use our guide to choosing replacement windows. Replacing an insect screen won’t correct a leaking window installation.
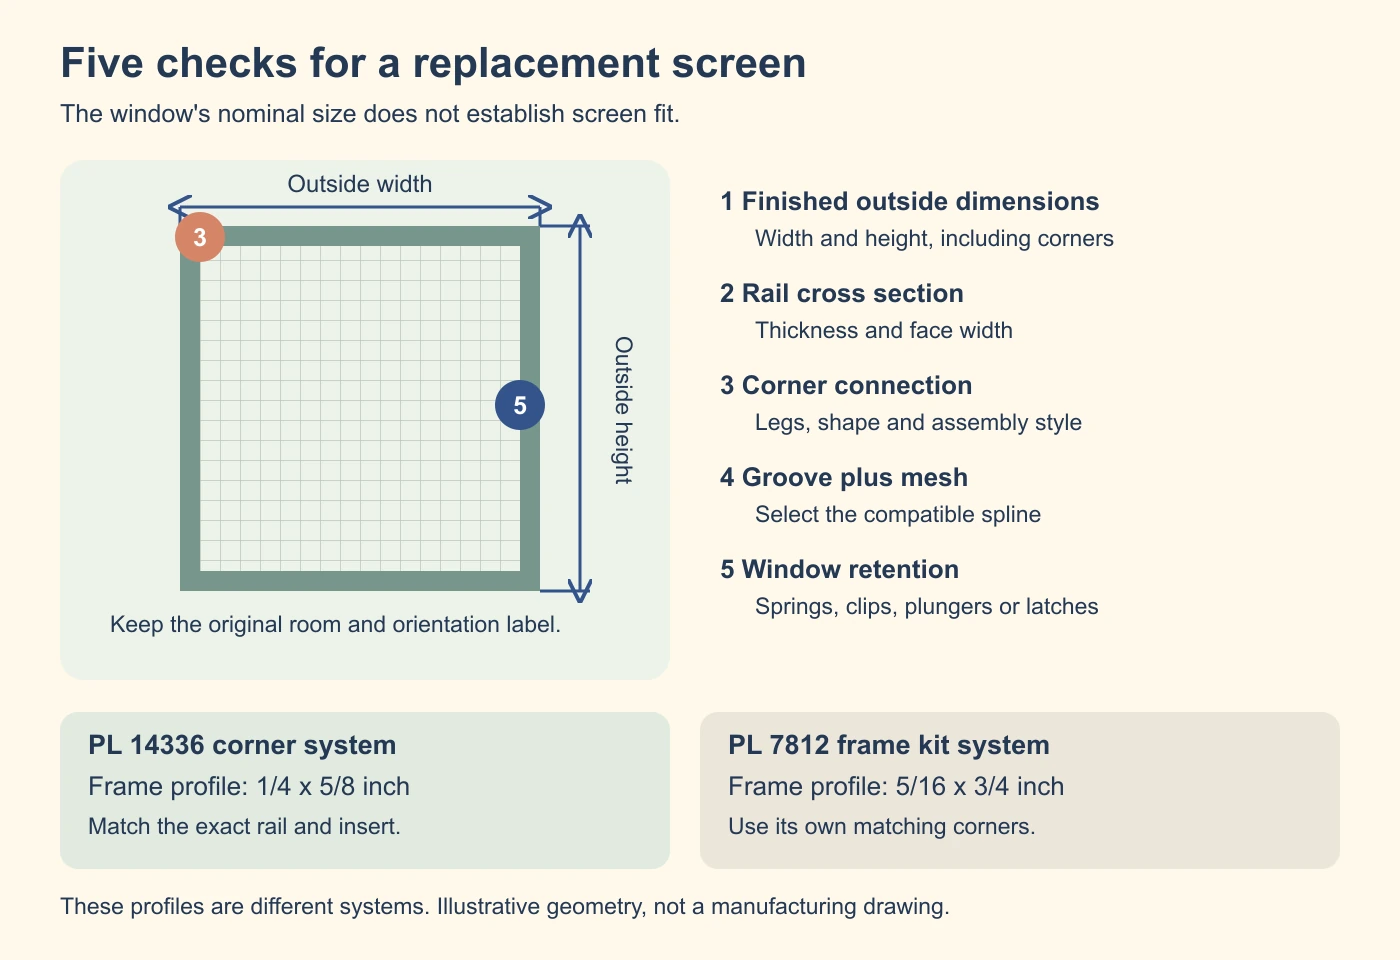
Record five separate fit checks before taking anything apart
Label the screen with its room and window position before removing it. Photograph both faces, each corner and every spring or clip. Two screens that look identical from across a room may have different hardware.
Look for the release method before pulling. Some assemblies use springs and pull tabs; others use plungers, clips or latches. Follow the window’s instructions and support the frame instead of tugging on the fabric.
Work from a secure position. If reaching the retainers requires leaning out of an opening or balancing on furniture, arrange suitable access or professional help. Don’t use a screen as a handhold.
1. Finished screen width and height
Measure the outside edges of the removable screen frame, including the corners. Record width and height separately, with the screen’s orientation marked. A straight original screen that fitted correctly provides a useful physical pattern.
Also check the window’s receiving channels. An old screen that always rattled or needed force isn’t a reliable finished size. Ask the replacement supplier which measurement boundaries their order form requires.
The glass opening, the complete window frame and the wall opening are different measurements. Our window size measurement guide explains those boundaries. Don’t use a whole window’s nominal size to order its removable screen.
2. Frame thickness and face width
The cross section is the shape of a rail viewed from its end. Record its thickness and face width, rather than writing down one number labeled frame size. Compare that shape with the supplier’s drawing.
A thickness mismatch can prevent a screen from seating in its channel. A matching outside width and height doesn’t compensate for that. Keep a short damaged rail sample when the existing frame must be rebuilt.
3. Corner construction
Photograph whether the corner fits into square rail ends or joins angled ends. Match the insert legs and their engagement with the frame. A corner that looks similar can belong to a different profile.
Don’t cut new rails until you have the actual corners and their assembly instructions. The corner contributes to the final outside dimensions. Its contribution determines how much shorter each rail must be.
4. Spline groove and mesh
Spline is the flexible cord that holds mesh in the rail’s groove. Its diameter is separate from frame thickness. Save a sample, inspect the groove and identify the replacement mesh before selecting the cord.
If the existing system uses flat spline, a rigid strip or another retainer, don’t automatically substitute round cord. Ask for the correct replacement system. Forcing an unfamiliar retainer into place can damage an otherwise reusable frame.
5. Hardware that retains the whole screen
Record clip locations, spring positions, pull tabs and latch styles. Some hardware sits in or under the spline channel and must be installed before the mesh. Other retainers attach separately.
Make a small sketch showing top, bottom and the room side. Add photographs of where the screen engages the window. This is particularly useful when a supplier can reproduce the frame but needs you to identify the hardware.
Why PL 14336 corners and PL 7812 frames don’t belong together
Two real component examples show why the profile check matters. Prime Line lists its PL 14336 white corner for a 1/4 x 5/8 inch screen frame. Its PL 7812 aluminum frame kit uses a 5/16 x 3/4 inch profile.
| Component example | Published profile | Useful conclusion |
|---|---|---|
| PL 14336 corner | 1/4 x 5/8 inch | Candidate only for the matching corner and frame system |
| PL 7812 frame kit | 5/16 x 3/4 inch, with 36 inch stock members | A separate frame system requiring its own matching components |
These aren’t interchangeable systems. A PL 14336 corner is not the matching corner for PL 7812 stock. Don’t buy both because one says mobile homes and the other says screen frame kit.
The manufacturer’s PL 14336 specification is a useful reference for the smaller profile. Check the actual old frame before treating it as your replacement. No single profile is established for every manufactured home.
This is the same compatibility problem described in our guide to matching ordinary and mobile home parts. The connection and dimensions decide suitability. A category label is only a starting point.
Choose the mesh for the problem you’re solving
For an otherwise sound screen, choose the fabric before finalizing spline size. Mesh materials and thicknesses differ. A stronger fabric doesn’t repair weak corners or incorrect retaining hardware.
- Routine insect screening: Standard fiberglass or aluminum belongs on the comparison list. Match the material’s handling instructions and the existing frame system.
- A clearer outward view: Compare fabrics designed for improved visibility. BetterVue is one documented example; it isn’t a stronger pet barrier merely because the view is clearer.
- Very small insects: Look for mesh specifically intended for small insects. Check the whole perimeter too, since finer mesh cannot close a gap beside a rail.
- Repeated claw damage: Pet resistant mesh can address fabric damage. Verify that its thickness works with the frame and spline before buying it.
- Sun and glare: Compare a specified sun control fabric rather than expecting ordinary insect mesh to solve that separate problem.
Ask for a sample when visibility matters. View it against the actual outdoor background from inside the room. A fabric’s appearance in a bright store can be a poor basis for choosing a whole house supply.
Pet resistant doesn’t mean pet containment. A stronger fabric still depends on its spline, corners and window retainers. Don’t rely on an insect screen to prevent an animal from escaping.
Window screens also don’t prevent children from falling. The CPSC window safety guidance explains that limitation. Keep children away from open windows and select any required protective device without blocking emergency escape.
Select spline from the groove and new mesh together
Don’t choose spline diameter from the home’s age, the screen’s outside dimensions or frame thickness alone. Measure the actual groove and check the fabric maker’s applicable table. An old spline sample helps identify the system but isn’t the entire answer after changing mesh.
The Phifer spline selection guide illustrates this distinction. For its listed 5/16 x 3/4 and 7/16 x 3/4 inch frame examples, BetterVue uses 0.140 inch spline. The table lists 0.125 inch for several thicker fabrics in those examples.
Those are product and frame examples, not a universal mobile home specification. They don’t establish the cord for an unidentified 1/4 x 5/8 inch rail. A matching frame label also doesn’t prove its groove is identical.
Manufacturer advice can be abbreviated differently across pages. A generic FAQ may say to choose one size smaller, while a detailed chart gives material specific exceptions. Use the guidance for your actual frame and fabric, and ask the supplier to resolve a mismatch.
Before rolling the entire perimeter, check a short section with the intended mesh. It should seat and hold without destructive force. Stop if the wheel repeatedly slips, the groove distorts or the fabric starts cutting.
Use this order worksheet for a replacement screen
A useful order description identifies the assembly, not just its dimensions. Copy this worksheet into a note and send it with photographs. Leave unknown fields marked unknown so the supplier can explain what to check.
| Field | What to record |
|---|---|
| Location and identity | Room, window position, maker label and model if readable |
| Original fit | Secure, rattling, binding, missing or previously altered |
| Finished dimensions | Outside screen width and height; supplier’s required measurement method |
| Rail profile | Thickness, face width, groove shape and end photograph |
| Corners | Connection style, exact part if known and photograph |
| Retention | Clip, spring, plunger or latch style; locations and orientation |
| Mesh and spline | Selected fabric, compatible spline type and confirmed diameter |
| Operating clearance | Installation route, sash movement and access to releases |
| Order meaning | Finished screen size versus opening size; who applies allowances |
That last line prevents two people from applying the same allowance. Ask whether the seller expects your finished screen dimensions or measurements of the window channel. Have them confirm the resulting finished size before fabrication.
For screens for mobile home windows that are missing entirely, an intact matching window can provide clues. Verify the profile and hardware rather than assuming every room matches. Take the measurements of the actual opening being repaired.
Compare quotes on the same basis. Ask whether mesh, matching spline, corners, pull tabs and window retainers are included. A frame kit and a complete ready screen may be very different purchases.
If you build a new frame, separate three sets of dimensions
Keep receiving opening dimensions, finished screen dimensions and rail cut lengths in separate columns. The clearance needed to insert a screen is one allowance. The portion contributed by the corners is another.
Use the actual kit instructions for both. A deduction from a sliding screen tutorial doesn’t automatically apply to another window style or corner system. Check the assembled empty frame before installing fabric.
Calculated example: Suppose a particular kit calls for a total 1 1/2 inch corner deduction from finished width. A hypothetical finished width of 30 inches needs two horizontal rails cut to 28 1/2 inches. That calculation only applies when the kit specifies that deduction.
It doesn’t mean you should subtract 1 1/2 inches from the window opening. First establish the finished screen size using the correct receiving channel measurements. Then calculate rail lengths with the matching corner instructions.
Stock length also matters. A kit with 36 inch members can’t supply an unbroken rail requiring a longer cut. Don’t splice rails unless the system specifically provides for that construction.
For larger assemblies, ask the fabricator about the correct frame section and any crossbar. Don’t assume a small kit can be scaled up by using longer stock. The frame must still hold its shape and fit its retainers.
Rescreen a sound frame without hiding a fit problem
These steps apply to a removable frame using flexible spline. Other retention systems need their own instructions. Photograph and measure the original assembly before disturbing it.
- Prepare a flat surface. Support the frame so it doesn’t twist while you work. Keep hands clear of the roller’s path.
- Lift and remove the old spline. Use a suitable small tool carefully at its end. Keep a sample and remove the worn mesh.
- Inspect the uncovered rails. Check corners, straightness and groove condition before spending time on new fabric. Resolve damaged components first.
- Fit any hardware captured by the spline. Restore its documented position. It can be difficult to add those parts after the mesh is finished.
- Lay out the new fabric squarely. Leave the overlap specified for the selected material and installation method. Don’t cut the sheet to the final visible opening.
- Seat the compatible spline with controlled strokes. Keep the weave straight and watch the rails as tension develops. Stop and reset a section if a corner opens or a rail bows.
- Inspect before trimming. Check that the mesh is captured around the perimeter and the frame remains square. Correct a loose section while excess material remains.
- Trim and reinstall. Follow the material instructions and keep the blade outside the retained mesh. Refit the screen using its proper release and retaining system.
Fiberglass and aluminum aren’t installed identically in every system. Aluminum may require forming the fabric into the groove before adding spline. Follow the instructions supplied for the fabric and frame rather than forcing one technique onto both.
After installation, operate the sash and check every retainer. Confirm the screen seats around its perimeter without needing to be twisted into place. Verify that its release remains accessible.
What to check when the repaired screen still misbehaves
| Symptom | Check next | Avoid |
|---|---|---|
| Fabric pulls out of one rail | Groove condition, complete spline seating and mesh compatibility | Automatically forcing in a larger cord |
| Frame fitted before rescreening but now binds | Bowing, opened corners and excessive fabric tension | Trimming the window channel to accommodate the distorted frame |
| Screen rattles although its fabric is sound | Springs, clips, latch engagement and correct finished dimensions | Buying stronger mesh as the first remedy |
| New corner will not enter the rail | Exact profile, leg geometry and obstructing fragments | Hammering in an insert from another system |
| Insects enter beside the frame | Perimeter gaps and fully engaged retainers | Assuming finer mesh alone will seal the edge |
Don’t screw, glue or permanently fasten a screen across an emergency escape opening to solve rattling. Preserve the window’s required operation and use the correct repair parts. Uncertain escape access needs qualified assessment.
Clean reusable screens according to the material instructions. Support the frame, avoid harsh scrubbing and keep track of which window each screen belongs to. Inspect the hardware when reinstalling instead of checking only the newly clean fabric.
Take an unknown profile or missing assembly to a screen fabricator with the worksheet and photographs. Ask them to identify what engages the window before choosing the mesh. Correct screens for mobile home windows start with that complete fit check.
Found a detail that needs checking? Tell us about a correction.