
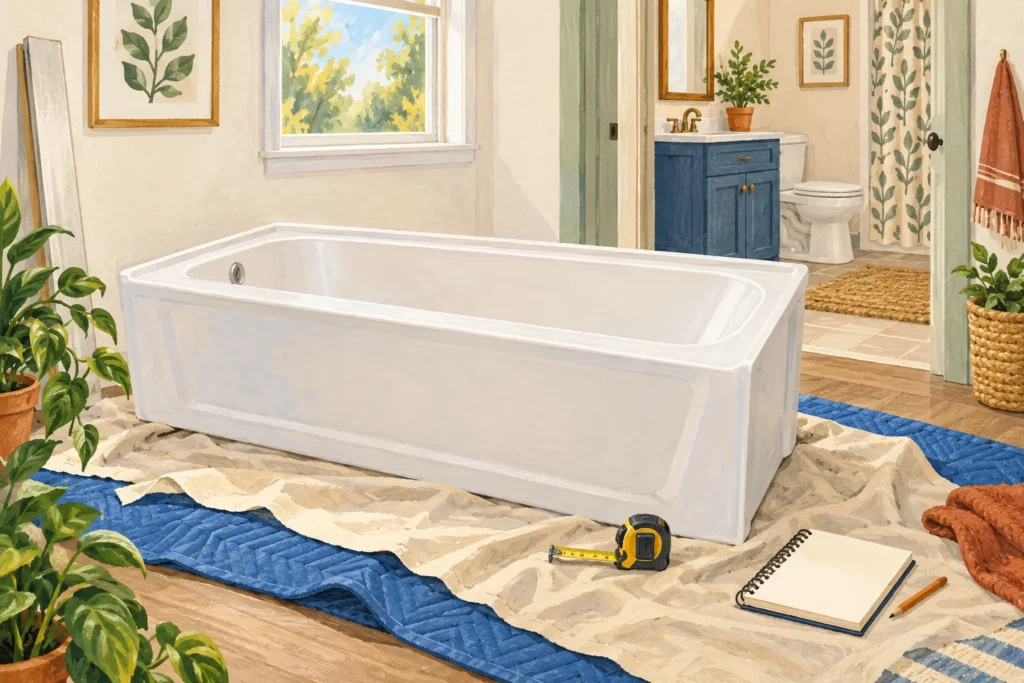
Mobile home bathtub sizes include 54 x 27, 54 x 30 and 60 x 30 inches, plus wider garden and corner designs. Those labels help narrow the search. Before ordering, match the actual tub drawing to your alcove, drain position and available floor space.
A tape reading across the visible basin won’t establish the replacement size. Wall panels can hide the rim, and the bathing well is smaller than the tub’s exterior. Keep those measurements separate so a promising size label doesn’t become an expensive delivery mistake.
For materials and the complete project scope, use the bathtub buying guide.
Mobile home bathtub sizes: useful examples, with limits
There isn’t one size that fits every manufactured home. The table below gives documented manufacturer examples, rather than assigning a tub to your home’s age. Dimensions are in inches and follow each maker’s listed product dimensions.
The order shown is length x depth x height. Length runs along the back wall; depth projects into the room. The listed unit height isn’t the usable water depth.
| Size family | Named example | Listed dimensions | What to verify separately |
|---|---|---|---|
| 54 x 27 | Lyons Victory VTL01542716R | 54 x 27 x 16 | Exact framing pocket, drain offsets and support |
| 54 x 30 | Lyons Elite ETL01543019R | 54 x 30 x 19 | Extra projection into the room |
| 60 x 30 | Lyons Elite ET01603016L | 60 x 30 x 16 | Full length, drain and access route |
| 54 x 42 garden | Lyons Classic Garden CGTL01544219C | 54 x 42 x 19 | Footprint, basin shape and drain location |
| 54 x 54 corner | Lyons Sea Wave X SXT01545419 | 54 x 54 x 19 3/4 | Corner geometry and apron projection |
| 54 x 27 product family | Aquatic 254027L | 54 x 27 1/8 x 15 | Actual width beyond the rounded product title |
The first five examples appear in the manufacturer’s current product catalog. They show the range of sizes, not a recommendation to buy those models. Request the exact model’s drawing and instructions before treating a catalog dimension as an installation dimension.
The final example comes from the Aquatic 254027 product specifications. Its title says 54 x 27, while the listed width is 27 1/8 inches. Even that small difference matters when the available space is tight.
A familiar label is a starting point, not a fit certificate. For the wider bathroom planning questions, see our guide to mobile home plumbing and bathroom parts.
Separate these measurements before comparing tubs
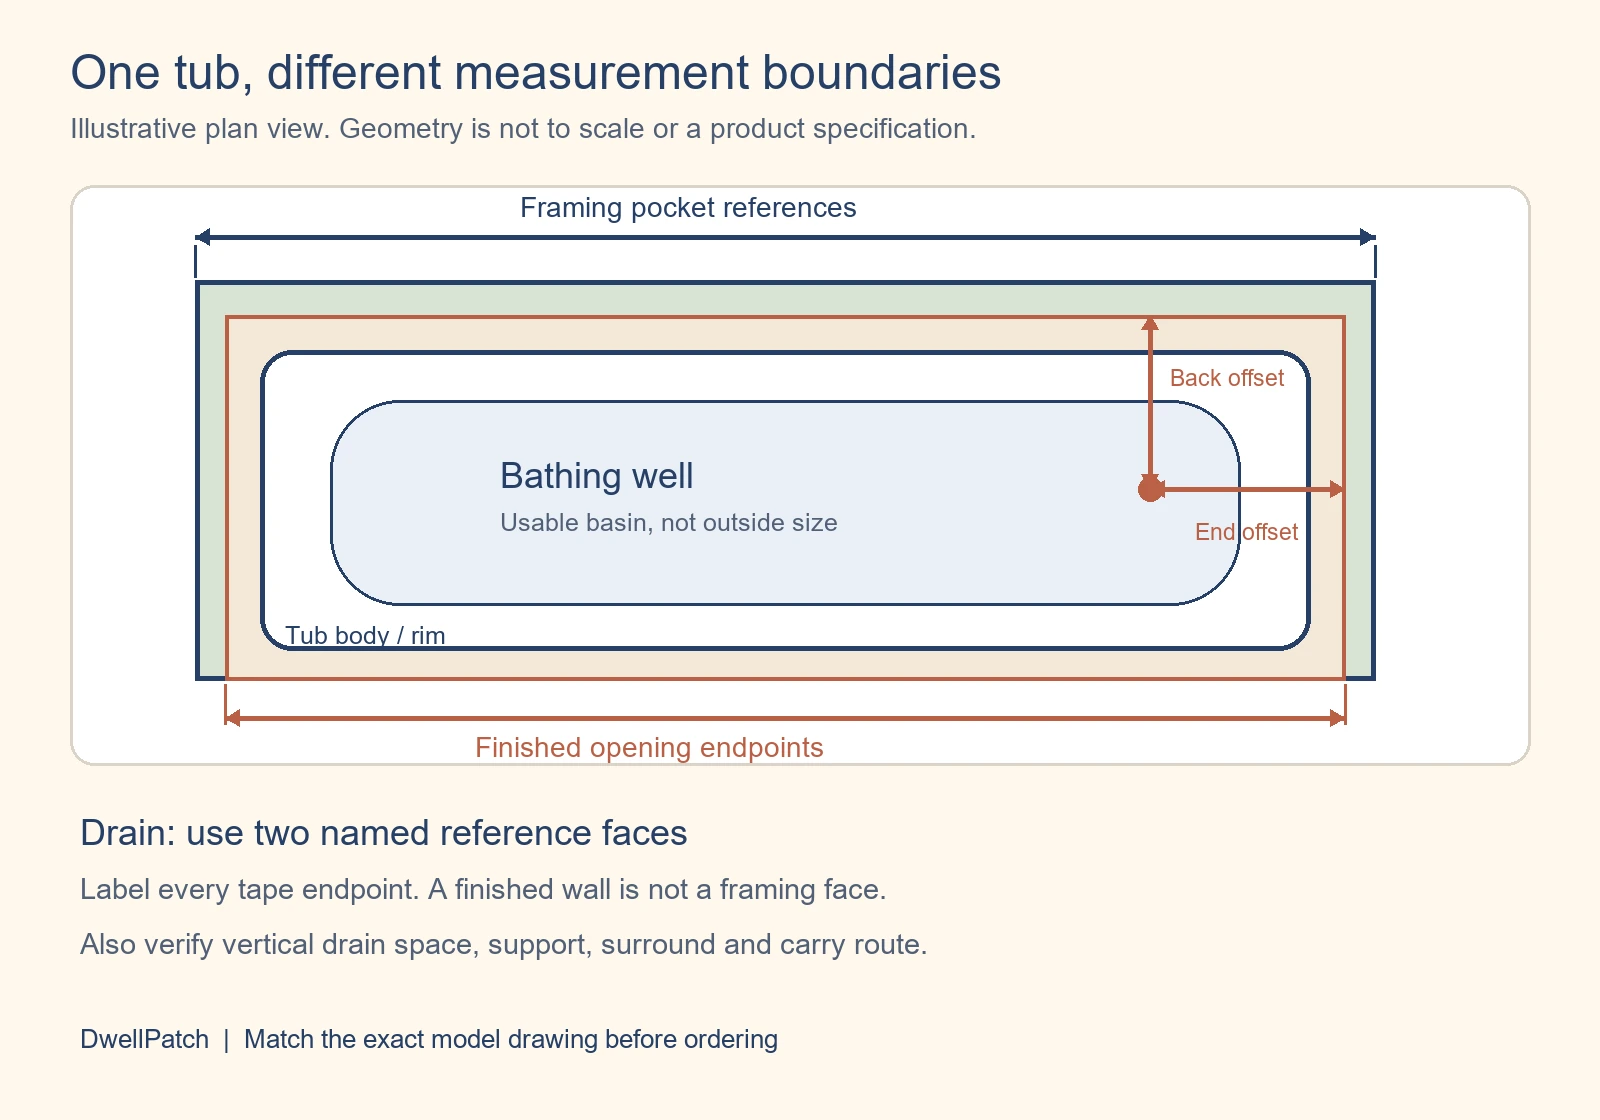
The visible opening between finished walls
This is the distance you can usually measure without removing anything. Put the tape against the finished surfaces and record the endpoints. Label the result finished opening, not rough opening or tub length.
Take a reading near the back, another near the front and another higher on the wall if accessible. Different readings can reveal an uneven opening or a measurement taken across different surfaces. Keep the individual values instead of averaging away a tight spot.
Don’t stand on a damaged tub or pry off panels merely to improve a preliminary measurement. Photograph what you can see. Hidden edges can remain marked unknown until the installer exposes them during planned work.
The tub’s outer body and flange
The outer body is the physical tub, including whichever edges the drawing counts. A flange is the raised lip used at a wall connection. Its position can be concealed by the wall finish.
Look for separate labels such as overall, net, framing and skirt height. They aren’t interchangeable. If the drawing gives two widths, identify the endpoints for each before comparing either with your tape reading.
Don’t subtract an assumed allowance from every model. A manufacturer’s required pocket can differ from the product’s advertised size. Ask for clarification when the sheet doesn’t show whether a flange is included.
The framing pocket
The framing pocket is the space prepared to receive the unit. A drawing may specify measurements between framing members or another defined surface. Follow that drawing’s reference, rather than relabeling a finished wall measurement.
A genuinely undersized framing pocket needs a revised replacement plan. A finished opening that looks undersized needs investigation first. Neither observation authorizes cutting studs or moving a wall.
The bathing well
The bathing well is the usable basin inside the rim. Its length, width and shape answer comfort questions. They don’t establish the space needed to install the tub.
For example, the Aquarius G 5427 TO lists an exterior of 54 x 27 inches. Its manufacturer specifications list a 43 x 19 inch bathing well. That model illustrates why exterior length doesn’t equal room to stretch out.
Use the actual basin drawing when bathing space is your concern. A wider garden tub may devote substantial space to its rim or molded features. Ask for the basin dimensions instead of estimating them from a photograph.
Measure an installed tub without guessing what’s hidden
Begin with a sketch of the room. Mark the tub’s front apron, back wall and drain end. Add a small arrow showing where you stood when taking photographs.
- Record the visible length. Measure between the finished end walls. Note whether the tape touches wall panels, tile, trim or an exposed tub edge.
- Record the depth into the room. Measure from the finished back wall to the front of the apron. Keep any projecting rim measurement separate.
- Record the height. Measure from the adjacent finished floor to the top of the accessible rim. Don’t call this soaking depth.
- Photograph the drain position. Include the whole tub and a close view. Mark the drain on the sketch before selecting a left, right or center option.
- Look for identification. Photograph any accessible label, molded model mark or retained paperwork. Don’t detach plumbing to find one.
- List concealed measurements. Write unknown beside the framing pocket, hidden flange and support details when they aren’t visible. Keep this list with the sketch.
Ask an installer to verify the hidden dimensions before the replacement becomes nonreturnable. A preliminary measurement can identify likely candidates. It shouldn’t become an invented final measurement because a delivery date is approaching.
Include fractions rather than rounding every reading to the nearest inch. Also record whether a measurement was awkward or partly obstructed. A clear note about uncertainty is more useful than false precision.
Why a 53 inch measurement doesn’t settle the order
Suppose your tape reads 53 inches between finished wall panels. That doesn’t prove the original tub was sold as a 53 inch model. It also doesn’t prove a 54 inch replacement will fit.
Calculated example: imagine a verified framing pocket measuring 54 inches between its reference faces. If finishes conceal 1/2 inch at each end, the visible opening becomes 53 inches. The calculation is 54 minus 1/2 minus 1/2.
This example explains how two truthful measurements can describe different boundaries. It isn’t a standard finish thickness or an allowance to add to your own reading. Your wall assembly may be different, and the actual pocket may still be too small.
Send the seller both the measurement and a photograph showing the tape endpoints. Ask which model dimension should be compared with it. If the answer only repeats the product title, request the dimensional drawing or installation support.
Don’t order a custom size solely because the exposed opening falls between familiar labels. First establish what was measured. Keep the old tub’s label and paperwork available until the replacement has been confirmed.
A 54 x 30 tub needs a separate width check
A 54 x 30 model and a 54 x 27 model share a nominal length. Their listed depths differ by 3 inches. In a small room, that difference can affect more than the strip of flooring beside the tub.
Calculated comparison: hold the same back reference line and compare rectangular footprints 27 and 30 inches deep. The deeper footprint projects 3 inches farther into the room. Actual flange positions and apron shapes still need their own drawing.
Sketch that additional projection before considering the larger size. Check the toilet area, cabinet doors, bathroom door swing and the space used to step into the tub. Have the installer check applicable fixture clearances for the proposed layout.
Don’t trim a tub’s rim, flange or apron to turn one size into another. A different surround doesn’t make the larger base smaller either. Choose a documented compatible unit or have the altered layout properly assessed.
The same reasoning applies when comparing 54 and 60 inch lengths. The numerical difference is 6 inches, but that doesn’t establish where the room can gain it. Wall alterations, plumbing movement and structural changes need a project specific plan.
Our guide to matching mobile home and ordinary house parts explains the broader compatibility question. For a tub, the drawing and installation system matter more than the aisle or marketing label.
Match the drain in two directions, then check its height
Left or right identifies a general end of the tub. It doesn’t describe the drain’s complete position. Two tubs with the same length and the same drain end can still need different plumbing arrangements.
Use the exact product drawing to identify the drain center. Record its distance from the specified end reference and its distance from the back reference. Those two offsets locate it on a plan view.
A note that says only “left drain, 54 inch tub” leaves both coordinates unresolved. Draw the drain as a dot on your sketch. Label the two reference lines and write the measured offset beside each one.
Don’t measure one offset from a finished wall and compare it with another measured from framing. Either use the same reference or show the difference explicitly. Label photographs so a mirrored image doesn’t reverse the drain end.
Next, have the installer check the vertical space for the drain assembly, overflow where fitted and trap connection. The floor position alone won’t settle this. Include access for making and testing the connection.
Manufacturer labels such as above floor rough and standard floor rough identify different arrangements. Don’t assume a label means every drain component will clear your existing floor. Check the exact drawing and instructions for the proposed model.
If you can’t see the plumbing safely, mark it unverified. A plumber can establish the connection route and condition. The overview of supply, drains and vents helps identify the systems involved without treating them as interchangeable.
Garden and corner tubs need more than a rectangle
Mobile home bathtub sizes become especially easy to misread with garden and corner designs. A 54 x 42 garden tub and a 54 x 54 corner tub aren’t the same shape. Neither label describes the basin, apron curve or access arrangement completely.
For a corner unit, trace the manufacturer’s footprint on your room sketch. Show the two wall sides and the front edge. A rectangular box around the tub can hide the space used by a projecting apron.
For a garden tub, distinguish the outer shell from any deck or platform around it. Measure both. A surrounding platform may stay in place, need reconstruction or belong to a different installation system.
Before replacing a large unit, ask where its weight is meant to bear. Also ask what needs to remain accessible for the plumbing. A matching outside dimension doesn’t answer either question.
If comfort is the reason for the change, compare basin shape and intended water depth separately. An outside footprint doesn’t predict either. Check hot water capacity as another project question, rather than assuming every tub of equal length fills the same way.
Check the floor, surround and delivery route
The support arrangement belongs to the exact tub
Record any visible floor damage or movement for the installer. Don’t cover a soft or damaged floor with a new fixture. The tub’s supports and the home’s floor need separate checks.
Ask how the proposed tub carries its load: through its base, prescribed supports or another documented arrangement. Don’t copy a mortar, foam or ledger instruction from a different model. The support detail needs to match the unit being installed.
This guide doesn’t provide floor repair dimensions or structural alterations. Those depend on the actual damage and construction. Resolving them before ordering can prevent a replacement tub from concealing the original problem.
The surround has its own fit requirements
A surround is the wall system around the tub. Its size, attachment and joint arrangement must suit the selected base. Matching one number in two product titles isn’t enough.
Check whether the wall system installs against framing or an approved finished backing. Confirm the specified tub interface and panel dimensions. Also compare existing faucet openings, shower fittings and any window with the proposed wall layout.
A panel advertised as trimmable still needs its own permitted cutting limits. Don’t transfer that claim to a molded tub. Keep the base drawing and surround instructions together when asking for compatibility confirmation.
The tub must reach the alcove
Measure the route from outside the home to the bathroom. Include the actual open doorway, hallway turns, ceiling obstructions and the bathroom entrance. The room can accept a tub that cannot make the final turn into it.
Use the selected unit’s complete exterior dimensions, including its flange and any fixed projections. Ask how it may be carried or rotated. A diagonal calculation alone doesn’t prove it can pass through a sequence of turns.
If the plan needs a door unit removed, compare that scope with our guide to door measurements and actual openings. Don’t assume the door’s catalog size is the clear passage available for carrying a tub.
A measurement sheet to send before ordering
Keep mobile home bathtub sizes, room measurements and unanswered questions in one record. Send the sheet with photographs and the exact candidate model number. Ask for written confirmation of any unclear dimension.
| Record | What belongs on your sheet |
|---|---|
| Existing identity | Home details, tub label, model mark and photos |
| Finished opening | Length readings, depth and clearly named endpoints |
| Verified pocket | Dimensions and reference faces, or unknown pending access |
| Proposed unit | Exact model, drain option, drawing date and overall dimensions |
| Drain | Two center offsets, vertical space and access status |
| Floor and support | Observed condition and the selected model’s support requirements |
| Wall system | Compatible surround, backing method and fitting positions |
| Room and route | Fixture space, door swing, smallest passage and tight turns |
Leave an unresolved item visible until someone has checked it. A seller can clarify a product drawing; an installer must compare it with actual site conditions. Neither should have to infer your measurement reference from a bare number.
You have enough information to order when the selected drawing matches the verified installation space and the remaining fit checks are resolved. Until then, a size label is a candidate. Keep it that way instead of making the bathroom conform to an assumption.
Found a detail that needs checking? Tell us about a correction.