
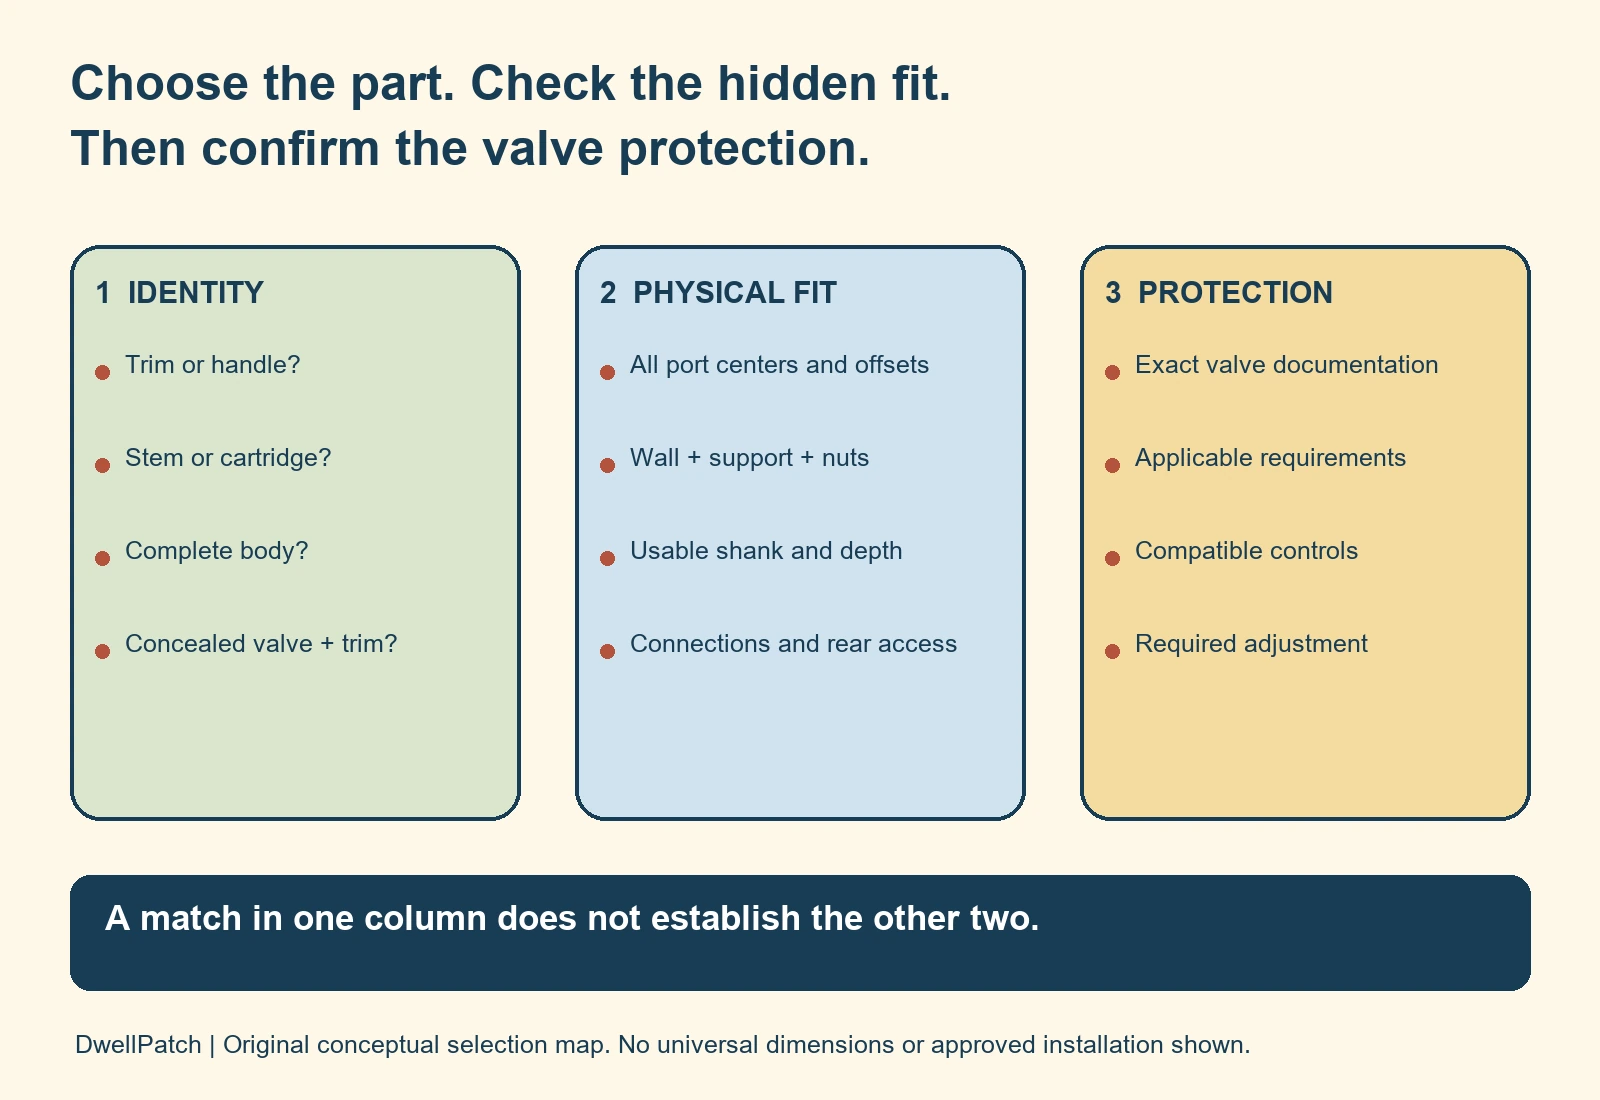
A mobile home shower faucet should be chosen by its valve system, hidden connections, and mounting space. Matching the handle count or an advertised 8 inch size isn’t enough. First establish whether you need visible trim, an internal repair part, or the complete valve body.
Then compare the replacement drawing with the actual installation. A faucet can cover the old holes yet leave too little threaded shank for the rear connector. A good match also needs an appropriate temperature protection arrangement and a practical way to inspect its connections.
Identify which mobile home shower faucet part you need
Shopping pages use “faucet,” “valve,” and “trim” loosely. Write down the actual part you’re replacing before comparing finishes. The distinction decides which measurements matter and how much work the purchase creates.
| Part being considered | What it does | What must match |
|---|---|---|
| Handle or decorative trim | Changes the visible controls and cover | Exact valve family, stem interface, fasteners, and mounting depth |
| Cartridge or valve stem | Services the water control inside an existing body | Manufacturer identification, internal design, and exact replacement part |
| Complete compact faucet body | Replaces the assembly carrying the controls and water connections | All port positions, wall holes, shanks, support, and rear access |
| Concealed mixing valve and its trim | Controls the mixture inside the wall through compatible visible controls | Valve and trim compatibility, depth, plumbing connections, support, and temperature protection |
| Showerhead or hose | Changes water delivery after the valve | Outlet connection and manufacturer requirements; it does not replace the mixing valve |
A worn finish doesn’t establish that the body needs replacement. Conversely, a fresh handle cannot repair a cracked body or a leaking rear connection. Describe the problem separately from the part you hope to buy.
For example, “the handle is loose” is a different shopping brief from “water appears behind the wall.” Photograph the visible controls and any accessible rear assembly. Keep the photos together so a supplier can connect the front appearance with the hidden hardware.
Find the valve identity before removing parts
Look for a maker’s name on the handle, cover plate, or accessible body. Save any installation papers from the home or a previous renovation. A brand on the showerhead doesn’t necessarily identify the valve behind the controls.
Record how the handle operates, its fastener location, and the cover’s screw positions. Those details help a manufacturer narrow the family. They should support identification rather than replace it.
If you need to expose more hardware, follow the identified manufacturer’s instructions and establish water isolation first. Don’t remove a cartridge, stem, retaining clip, or pressurized connection just to obtain a shopping photo. Use the water shutoff identification guide if the isolation point is uncertain.
Separate a compact body from a concealed valve system
Some installations have a compact assembly with separate hot and cold handles. Its body may carry a tub spout and a rear outlet feeding the shower. Other installations use a mixing valve inside the wall with a separate decorative cover and handle.
These arrangements call for different purchases. A complete compact assembly isn’t a trim kit for a concealed valve. A trim kit may contain attractive visible parts without supplying the body your wall needs.
Check the package’s included parts against its installation drawing. “Valve included” and “trim only” are material differences. A product photograph cannot establish what arrives in the box or what existing hardware it accepts.
Shower only and tub/shower are different water paths
A shower only arrangement has no need to divert water to a tub spout. A tub/shower assembly must provide the intended route to both outlets and a matching diverter arrangement. Don’t assume unused ports can be capped or rerouted without the specific instructions.
Trace accessible connections instead of identifying them by position alone. Mark hot supply, cold supply, shower outlet, and any separate tub outlet on your notes. Treat an unidentified connection as an unanswered question before ordering.
A third connection on a compact body can be an outlet to the shower. It isn’t another supply simply because it sits between two supply connections. This is why a rear view matters even when the front looks familiar.
Measure the hidden fit, not just the handle spacing
Use the exact manufacturer’s drawing as a checklist against the existing assembly. Measure between connection centers rather than outside edges. Record horizontal spacing and any vertical offset separately.
An “8 inch” description can identify one spacing while leaving other dimensions unresolved. It doesn’t tell you the center outlet’s position, usable shank length, or wall thickness allowance. Those details can prevent an apparently similar replacement from connecting.
| Check | Record at the existing shower | Compare before buying |
|---|---|---|
| Port pattern | Every supply and outlet center, including offsets | Exact drawing and connection labels |
| Mounting holes | Number, position, and actual hole condition | Required holes and permitted mounting arrangement |
| Wall stack | Surround, backing, and support occupying the shank | Allowed thickness and usable threaded length |
| Rear clearance | Room for nuts, connectors, pipe bends, and service | Installed envelope, not just the bare body |
| Face coverage | Old holes, marks, damage, and sealing surface | Actual base or trim coverage and gasket placement |
| Concealed valve depth | Body position relative to the finished wall | Specified finished wall range and compatible trim |
| Connection system | Pipe material, connector type, and sealing method | Documented inlet and outlet requirements |
Leave enough shank for both mounting and connection
The wall and backing consume part of a threaded shank. A mounting nut consumes more room before the supply connector can engage. Seeing threads beyond the nut doesn’t prove enough usable length remains for that connector.
Consider this hypothetical fit check: two faucets share the same outer spacing and cover the same openings. One has shorter shanks, while its mounting nuts occupy more depth. That second faucet can fail the connection check despite passing the visible checks.
Ask for the relevant drawing or written confirmation if the seller provides no usable shank information. Don’t remove support or thin the wall merely to make the wrong product reach. An alteration needs its own assessment of mounting strength and the wet wall assembly.
Base coverage doesn’t repair damaged material
A wider cover may conceal an old opening, but the material beneath still needs an appropriate mounting and sealing surface. Soft backing, cracks, and unsupported holes affect the work required. Photograph those conditions before deciding that a cosmetic swap is sufficient.
The same caution applies to a decorative conversion plate. Establish which valve and trim combination it supports and how the wall will remain watertight. Its size alone doesn’t establish a sound conversion.
For the broader compatibility question, see how ordinary replacement parts can fit a manufactured home. The housing label is a starting category, while the actual installation decides the purchase.
A documented Danco example, with important limits
Danco 10882X illustrates why a product name needs a complete fit check. Its model description and specifications identify a plastic body with plastic threaded shanks. Chrome describes its finish, not a metal body upgrade.
The stated outer water connections are 8 inches apart. The description gives 4 inches from an outer connection to the middle connection. Compare the actual port arrangement as well as those spacings; don’t infer the whole pattern from one number.
The family instruction shows a separate rear shower outlet. It directs hand tightening of the mounting nuts and specifically excludes using a wrench on those nuts. That restriction belongs to this documented assembly, rather than every faucet sold for mobile homes.
Consider this model only for a matching arrangement after checking mounting thickness, connector access, and temperature protection requirements. Don’t choose it as an adapter for an unrelated concealed valve. It also doesn’t establish compatibility with every faucet described as offset.
Measure actual base coverage before relying on it to hide existing marks or holes. Conflicting width fields on the manufacturer’s page prevent a dependable exact base width claim here. Ask the maker to confirm that dimension for the supplied part.
A different construction may suit your installation, but it needs the same documented checks. Compare its documented body material, connection layout, and service requirements before treating it as an upgrade.
Trim compatibility depends on the exact valve family
For a concealed system, start with the valve already in the wall if you plan to retain it. Match its model or documented family to the proposed trim. Finish, handle count, and a shared brand name don’t establish interchangeability.
Moen’s trim identification guide distinguishes several valve types and their matching controls. It uses handle operation and screw locations as identification clues. Even within that brand, the guide explains that trim kits aren’t generally interchangeable.
Use that as an example of the identification process, rather than a universal brand chart. Contact the actual valve manufacturer with photos if the family remains unclear. Ask for the exact compatible trim and service part numbers in writing.
Ask what the new trim kit changes
Some purchases change only visible components. Others include a cartridge for a particular body. Check the included cartridge separately from the trim’s mechanical compatibility with an older installation.
A package can therefore look complete yet still need additional compatible parts. Make a small list headed “retained,” “included,” and “needed separately.” Put the existing body, cartridge, trim, showerhead, and any tub spout in their correct columns.
Don’t assume that changing a cover or handle changes the valve’s temperature protection. The protective function belongs to the documented valve system. A cosmetic update and a valve conversion are different scopes of work.
Check temperature protection before committing to a replacement
Temperature protection deserves its own purchase decision. Separate hot and cold handles, a single handle, and a pleasant looking finish aren’t evidence of a particular protective function. Look for the assembly’s documentation and applicable listing.
The current federal manufactured home fixture standard addresses shower and tub/shower mixing valves in section 3280.607(b)(3)(vii). It specifies balanced pressure, thermostatic, or combination valves conforming to ASSE 1016. It also requires adjustable handle stops set no higher than 120 degrees F.
That current manufacturing standard doesn’t, by itself, settle the permitted repair scope in every existing home. Have the plumber or local authority confirm what applies to your proposed replacement or conversion. Don’t treat an old installation or a store’s mobile home category as blanket approval.
Ask specifically whether the proposed assembly provides the required protection and what adjustment its instructions require. Include that adjustment and verification in the installation quote. Buying compatible trim alone cannot answer those questions.
If shower temperature changes sharply during use, stop treating the problem as a finish selection. Have the valve and supplies evaluated before choosing the replacement. A different showerhead doesn’t establish that the underlying control problem has been corrected.
Plan service access and pipe connections together
Locate any existing service opening behind or beside the shower. Note whether it exposes the complete body and every connection. An opening that shows the pipes may still leave too little room to disconnect and reconnect them properly.
Don’t plan a blind swap that cannot be inspected afterward. Ask the installer how the work will be accessed, supported, tested, and closed. If a new opening is proposed, its location needs assessment for hidden utilities and the wall assembly.
Identify the pipe before selecting adapters. An old supply connector that fits a new shank doesn’t prove its pipe connection is correct or reusable. The water line identification and repair guide covers that separate decision.
Keep connection sealing requirements specific to the product and joint. Don’t add tape, sealant, extra washers, or wrench force based on a generic faucet tutorial. Obtain the instructions for both the fixture and its connectors when their requirements aren’t clear.
For a proposed conversion, ask whether the quote includes changes to the shower riser, tub outlet, backing, and access closure. These items can determine whether an attractive valve is practical in the existing space. The purchase price alone doesn’t describe the project.
Build a useful purchase or plumber brief
You can make a mobile home shower faucet decision much easier with a single page of verified information. Leave unknown fields marked unknown. Filling them with guesses hides the reason a supplier needs another measurement.
- Describe the goal. State cosmetic refresh, identified internal repair, complete body replacement, or temperature control conversion.
- Document identity. Add manufacturer marks, operation, visible fasteners, and any confirmed model or cartridge number.
- Map connections. Include labeled front and rear photos, port centers, offsets, and the required water paths.
- Record the wall fit. Include support thickness, usable space, current damage, and the proposed part’s drawing.
- List included parts. Separate body, trim, cartridge, showerhead, spout, connectors, and mounting hardware.
- Resolve protection and access. Request confirmation of the applicable valve requirements, service route, adjustment, and final inspection.
Compare proposals using that same brief. A trim refresh and a complete valve conversion shouldn’t be compared as though they deliver the same result. Ask each installer to identify which existing parts remain and which connections are being altered.
Keep the selected drawing, part numbers, and installation instructions after the job. Add a photo of the accessible connections before the service panel closes. This creates a useful service record without assuming the next owner will recognize the fixture by appearance.
The plumbing and bathroom planning guide helps place this purchase within a wider bathroom project. If you’re keeping the current shower, finish the valve and fit checks before choosing its new appearance.
Questions that can stop the wrong order
Can a regular house shower faucet fit?
It can be a candidate when the complete system fits the installation and meets the applicable requirements. Verify the body, trim, wall depth, connections, mounting, and access. Neither “regular house” nor “mobile home” settles those checks.
Is every 8 inch faucet interchangeable?
No. That dimension doesn’t establish all port locations, shank length, mounting thickness, or connector clearance. Request the exact drawing and compare the hidden arrangement before ordering.
Can I replace two handles with one?
Possibly, but that’s a valve conversion rather than a handle swap. It requires a compatible body and trim, suitable mounting and access, and an appropriate treatment of the old openings. Have the installation and temperature protection requirements assessed before buying the visible kit.
Should I buy a whole faucet for a drip?
First identify the valve and the leak location. An available compatible service part may address an internal fault, while body damage or connection leaks need a different assessment. Don’t order a complete mobile home shower faucet solely because its handles resemble yours.
Found a detail that needs checking? Tell us about a correction.