
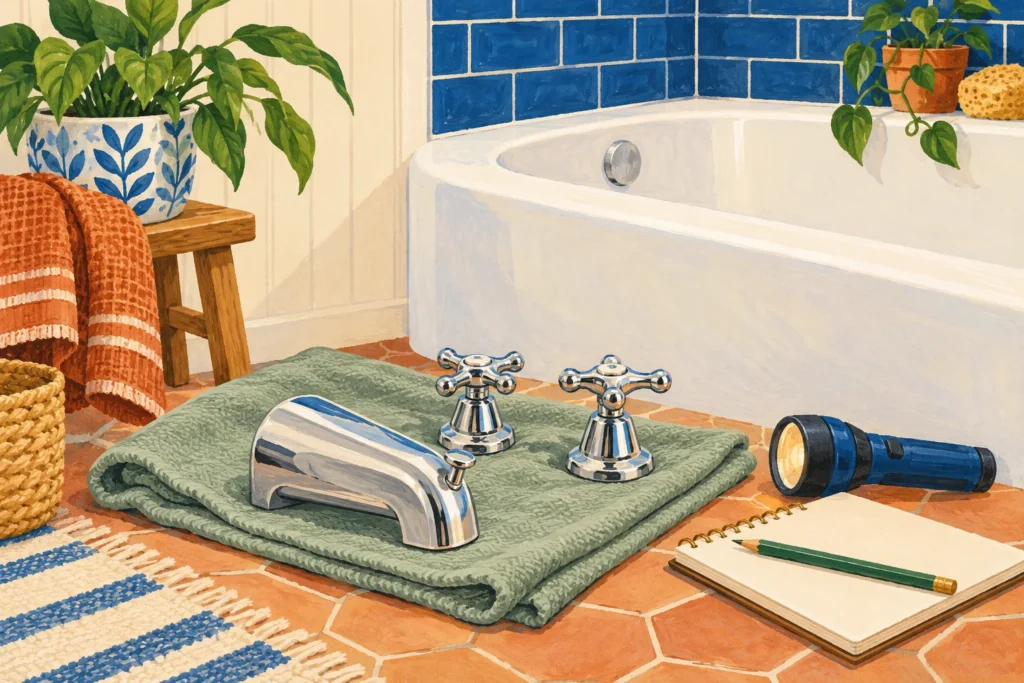
A mobile home bathtub faucet may mean one replaceable spout, a complete exposed faucet body, or trim attached to a concealed valve. Those are different purchases. Identify which assembly you have before ordering anything by handle count or finish.
The useful starting point is a photo of the front and an accessible view behind it. Together, they show what the new part must connect to. A matching chrome face doesn’t establish a matching water connection.
Identify your mobile home bathtub faucet before shopping
Look at where the handles and spout meet the tub or wall. Then find the model number, if available. Keep the old fixture in place while gathering information unless removal is needed and the water is safely isolated.
| What you have | What must match | What a spout purchase won’t replace |
|---|---|---|
| Separate spout projecting from the wall | Threaded, slip fit, or proprietary adapter connection; required pipe projection | Hot and cold control valve, cartridges, or damaged concealed pipe |
| Handles and spout sharing one exposed body | Body mounting pattern, rear supply connections, shower outlet, and mounting surface | The complete body when its integral spout or connection has broken |
| Separate handles and spout mounted on a tub deck | Exact valve family, trim compatibility, deck holes, and service access | Concealed valves simply because the visible finish matches |
| One handle with a large wall plate and separate spout | Concealed valve model and approved trim or a planned valve conversion | The mixing valve behind the plate |
An exposed body often looks like a single faucet with a wide backplate. Its water connections pass through the mounting surface. A separate wall spout instead attaches to its own projecting pipe or adapter.
Don’t assume the center spout on a shared body unscrews like a conventional wall spout. Check the exploded drawing for the actual model. Twisting an integral or broken part can damage the rest of the assembly.
Garden tub and Roman tub labels also need care. They describe shopping categories, but they don’t identify the hidden valves. A tub deck with three visible pieces can still have a connected assembly underneath.
The same distinction applies when comparing mobile home parts with ordinary house parts. A housing label helps narrow the search. The connection and installation drawing decide fit.
Decide whether you need a spout, a repair part, or a complete body
Write down where water appears and when it appears. A drip after bathing and a continuous drip with the controls closed are different observations. Neither is enough to choose a replacement by appearance alone.
Water keeps coming out with the handles closed
The shutoff function belongs to the control valve, not simply the spout outlet. Buying a new outlet may leave that fault untouched. Identify the valve and its service parts before replacing the decorative piece.
For example, Moen’s deck mounted tub filler guidance directs persistent closed handle leakage toward the cartridges. That example doesn’t identify your cartridge. It explains why the location where water exits isn’t always the failed component.
The shower runs, but water still pours from the spout
Record whether the diverter moves, stays engaged, and changes the flow. A failed diverter is one possibility. Restrictions, installation problems, and the actual valve arrangement can also matter.
Don’t buy a complete faucet solely because shower flow seems weak. Compare tub flow with other fixtures first. If several outlets have changed together, start with the water pressure checks rather than assuming one spout is responsible.
The body, shank, or pipe has broken
A cracked faucet body and a broken supply fitting need different repairs. Photograph both sides of the break. Keep any loose pieces for identification without trying to screw fractured plastic back together.
Water escaping behind the wall changes the priority. Stop using the fixture and isolate its supply if you can do so safely. A new visible faucet won’t repair a wet wall, damaged support, or a split connector.
For an intact, identifiable fixture, ask the manufacturer whether a stem, cartridge, or diverter service kit exists. Compare that repair with complete replacement. Access difficulty and the condition of the remaining body matter as much as the part price.
Use two separate fit checks: the front and the back
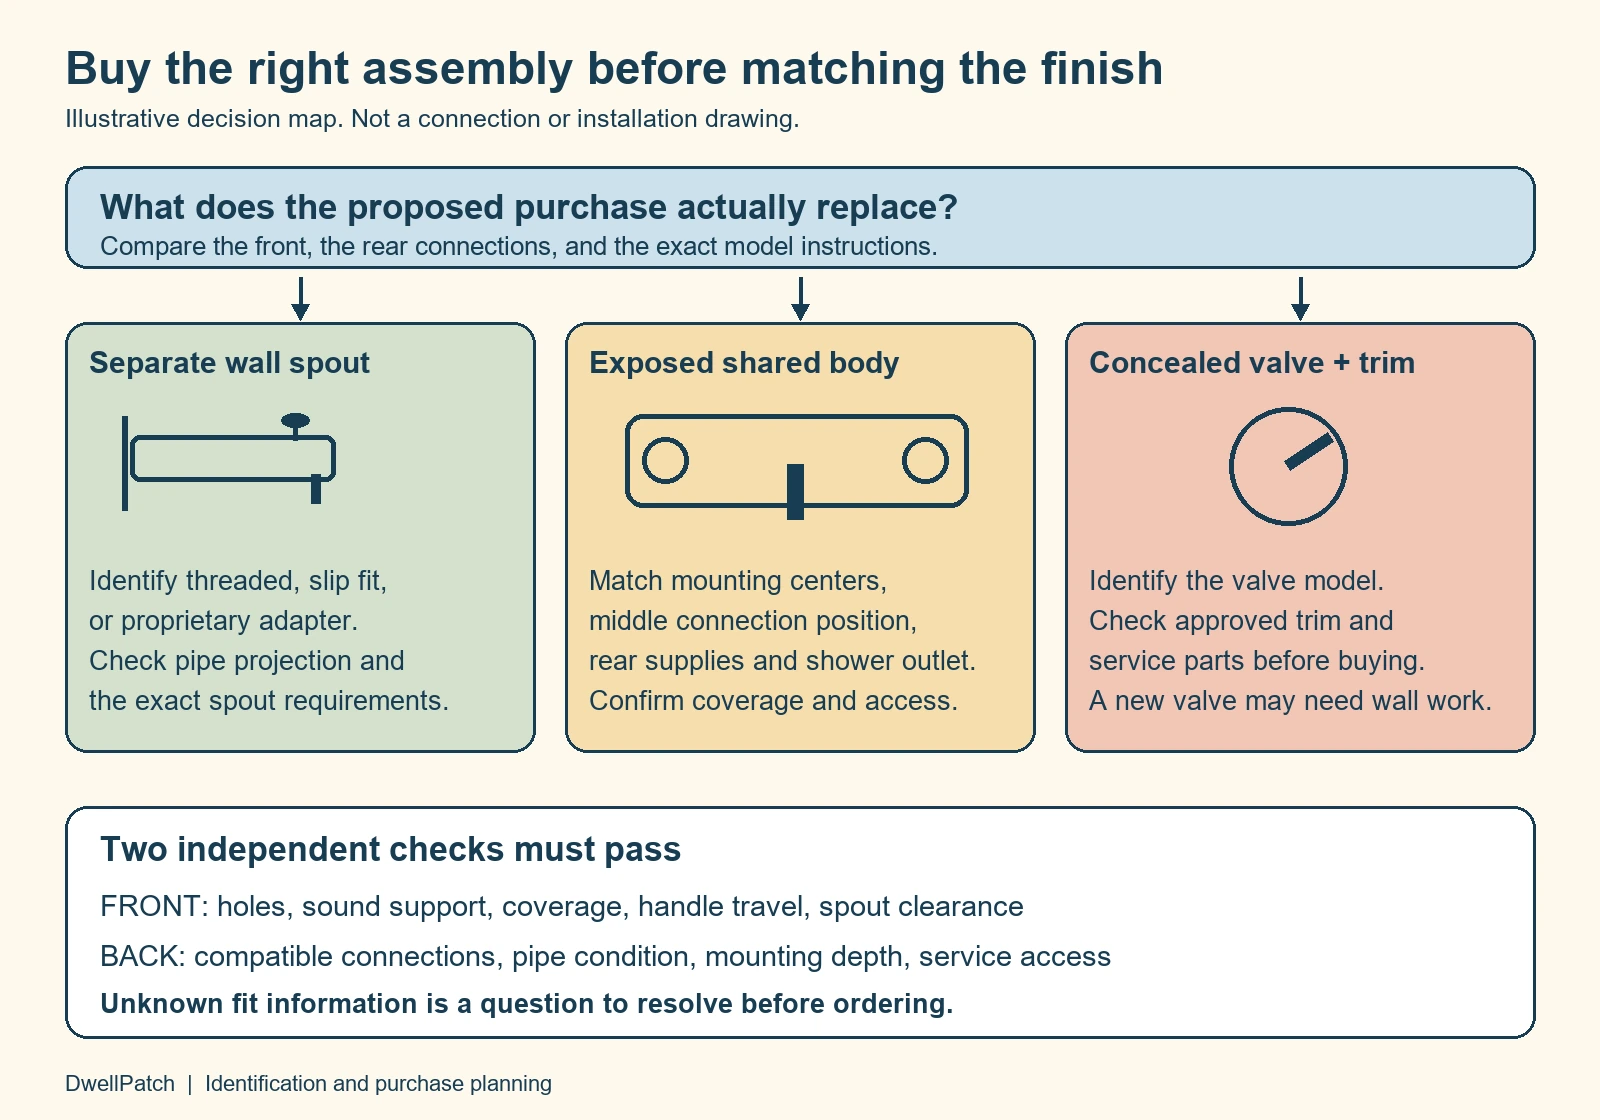
The front tells you whether the fixture can mount and cover the opening. The back tells you whether water can reach it safely. Passing one check doesn’t compensate for failing the other.
Front check: measure actual centers and coverage
Measure between the centers of the hot and cold connections. Don’t use the outside edges of the handles. Handle shapes can make identical mounting patterns look different.
Next, record the middle connection’s position relative to those outer centers. Is it on the same line, above it, or below it? Photograph the pattern squarely, with a ruler visible when practical.
A label such as offset or centerset isn’t a complete drawing. Product families can use different arrangements. Compare the actual connection pattern rather than treating one word as proof.
Measure the opening and the sound mounting surface around it. The new base must cover the opening and sit on adequate support. Covering a damaged edge doesn’t make that edge capable of carrying the fixture.
Also check handle travel, spout clearance, and the direction of the water stream. A lever may strike the surround before it opens fully. A spout that barely reaches over the rim may be impractical despite matching holes.
Back check: inspect supplies, outlet, and working space
Use the existing service opening when available. Find the hot supply, cold supply, and any shower connection. Note their positions before deciding the new body can reconnect without changes.
Record pipe markings, connector type, and condition. A nut that starts onto a thread isn’t proof of a correct seal. Compare the connector and sealing method with the faucet instructions.
Older gray tubing needs identification before any adapter choice. Our guide to polybutylene fitting compatibility explains why pipe identity matters. Don’t treat all plastic pipe as interchangeable.
Check room for mounting nuts and supply connectors, not just room for your fingers. The installed shank must accommodate the mounting surface and hardware. An unusually thick surround or added wall layer can change that fit.
Rigid lines may not move to a new connection position. Don’t pull them into alignment or use the faucet to hold them under strain. If piping must change, make that a planned repair rather than a surprise during assembly.
For a separate spout, distinguish threads from slip fit
A threaded spout screws onto a compatible threaded nipple or adapter. A slip fit spout slides over compatible smooth tubing and uses its specified retaining arrangement. These are not interchangeable merely because both listings mention half inch pipe.
Inspect underneath before trying to turn the spout. Moen’s spout identification guide distinguishes its threaded and set screw styles. Other adapters require their own model instructions.
If a set screw is present, don’t twist the assembly as though it were threaded. If corrosion hides the attachment, stop and identify it first. Extra leverage can transfer force into concealed plumbing.
For a threaded replacement, record where the threads sit and how far the pipe projects from the finished wall. Compare those measurements with the exact new spout’s requirements. Total spout length alone doesn’t tell you where its internal threads engage.
A longer decorative shell doesn’t necessarily accept a longer nipple. Likewise, a matching nominal connection size doesn’t guarantee the spout will finish against the wall. Ask for the connection drawing when a listing provides only exterior dimensions.
There is no universal nipple projection for every mobile home bathtub faucet. Don’t shorten or extend concealed piping to an internet rule that belongs to another model. Have uncertain pipe changes assessed before modifying the stub.
Two documented examples solve different problems
These examples illustrate selection boundaries, not a universal shopping list. Neither has been tested by DwellPatch. Confirm the actual package, instructions, and installation before choosing a part.
Danco 88186: a threaded diverter spout
The 88186 manufacturer page identifies a metal spout with a front diverter and a 1/2 inch IPS connection. It replaces a compatible separate spout. It doesn’t replace the hot and cold controls.
This is a candidate only after confirming the threaded connection and projection. It isn’t a slip fit solution for bare copper tubing. The housing description doesn’t override either condition.
The model’s instruction drawing shows a threaded nipple and calls for hand tightening during installation. It supplies no numerical nipple projection range. Obtain fit confirmation rather than borrowing a measurement from a different spout.
Danco 10882X: a complete plastic faucet body
The 10882X product specifications describe plastic construction and plastic threaded shanks. They give 8 inches between outer water connections and 4 inches from an outer connection to the middle connection. Those dimensions describe this model, not every manufactured home fixture.
Check the middle connection’s actual alignment and the rear shower outlet against the family drawing. The two 4 inch intervals do not establish a universal vertical offset. A different rear pattern can require different plumbing despite similar handles.
The maker’s page contains conflicting base width fields. Measure the actual part or obtain a confirmed drawing before relying on coverage. We haven’t resolved that conflict by choosing the larger number.
The chrome finish doesn’t make this a metal body upgrade. Its useful comparison is a compatible replacement body versus repairing your existing assembly. It isn’t interchangeable with the 88186 spout above.
The family instructions place a plastic gasket between the body and wall. They specify hand tightening the mounting nuts without wrenches. Don’t substitute blanket putty and extra wrench turns for the supplied directions.
Confirm which connectors and other parts come with the exact package. A product title doesn’t establish that your existing pipes or shower connection will fit. Resolve uncertain package wording with the manufacturer before scheduling the work.
Make a purchase worksheet that catches expensive mismatches
Use this worksheet with your photos and the proposed replacement drawing. Fill in each line rather than writing only the brand name. An unanswered item is a question for the supplier or plumber.
| Record | Your existing installation | Proposed part |
|---|---|---|
| Assembly type | Separate spout, complete exposed body, or concealed valve and trim | Same replacement category or a planned conversion |
| Model identity | Brand, number, markings, and photos | Exact model and current instruction sheet |
| Mounting geometry | Outer centers, middle position, opening, and surface thickness | Drawing agrees with each relevant measurement |
| Spout connection | Thread, smooth tubing, or proprietary adapter; projection | Specified connection and permitted projection |
| Rear connections | Hot, cold, shower outlet, pipe markings, and seal type | Compatible connections with room to assemble them |
| Coverage and movement | Sound mounting area, tub rim, and handle obstructions | Base covers opening; handles and stream clear obstacles |
| Service plan | Water isolation, rear access, and any visible damage | Accessible installation and a way to inspect for leaks |
For example, imagine two exposed fixtures with the same outer connection spacing. One has a middle connection below the outer line; the other has all three aligned. The shared width doesn’t make their rear layouts equivalent.
Or imagine a separate spout with matching threads but no confirmed projection requirement. That purchase remains uncertain. A finish choice can’t answer the missing fit question.
Ask a supplier a specific question: does this exact model match the photographed pattern and recorded mounting thickness? Include your dimensions and the model number. A general promise that it fits mobile homes isn’t enough.
Plan the replacement around access and the condition of the plumbing
Establish how to isolate the water supply before disconnecting anything. Verify that flow stops after isolation and release remaining pressure as appropriate. A closed handle doesn’t make a pressurized connection safe to remove.
If rear access is missing, decide how service access will be created before buying a new body. Don’t cut blindly behind the surround. Pipes, wiring, framing, and the opposite room’s finish may affect the plan.
Inspect the mounting surface once accessible. Soft material, movement, or staining needs investigation before the opening is covered again. A wider plate can hide damage while leaving the underlying problem in place.
Read the exact instructions for gasket placement, approved sealants, connection sealing, and tightening. Different joints use different sealing methods. Adding tape or putty everywhere can conflict with the joint’s design.
Before closing access, arrange to observe the rear connections during a controlled leak check. Check tub operation and the shower path when present. A dry front plate doesn’t prove the connections behind it are dry.
Changing a concealed valve or the pipe arrangement is a larger project than replacing compatible exposed parts. Ask the installer about the applicable temperature protection and local requirements. Matching the old appearance doesn’t establish approval for a new installation.
For a broader renovation, use the mobile home bathroom planning guide to separate fixture work from tub, drain, and wall repairs. Keep those jobs in the estimate. They shouldn’t disappear into a small faucet allowance.
Questions worth settling before you place the order
Can I use a regular bathtub faucet?
Possibly, if its mounting, connections, support, and applicable installation requirements match. A conventional concealed valve can require substantial changes behind the wall. Treat that as a designed conversion rather than a direct swap based on finish.
Are all mobile home tub faucets 8 inches?
No single measurement identifies every assembly. Measure your connection centers and compare the exact model drawing. Separate spouts and deck mounted systems also use different fit checks from an exposed shared body.
Can I replace only the handles?
Only with compatible parts for the existing valve or stem system. Similar shapes and matching colors don’t establish compatibility. Find the model and service diagram before ordering a cosmetic change.
Should I choose metal instead of plastic?
Material matters, but it doesn’t rescue a mismatched connection. Compare the documented body material, service parts, installation demands, and fit. A metal separate spout isn’t an alternative to a complete plastic faucet body.
What is the most useful thing to bring to a parts counter?
Bring clear front and rear photos, the model information, and your completed measurements. If a part has already been safely removed, bring it too. The best mobile home bathtub faucet choice is the one supported by that evidence.
Found a detail that needs checking? Tell us about a correction.