

Is your mobile home window leaking during rain? Find where water first appears before adding sealant. A blocked drain, failed window joint and leak above the opening need different repairs.
Start by protecting the room and recording the wet area. Then separate water on the glass from water escaping the frame or wall. The bottom corner where a drip lands may be far from its entry point.
Mobile home window leaking: choose the first check
Use the timing and location together. Neither a stain nor a cracked bead of caulk proves the cause by itself.
| What you observe | What to check next | What it does not prove |
|---|---|---|
| Water collecting in the lower window track | Identified frame drains, track debris and whether the sash closes correctly | That the whole window needs replacement |
| Drips at the interior top during rain | Window head joint, flashing, siding and wall or roof details above | That a top bead of caulk will reach the entry |
| Wet wall below a lower corner | Frame drainage, perimeter joint and concealed opening damage | That the leak begins at that corner |
| Droplets on the room side of cold glass without rain | Indoor humidity and surface condensation | That exterior flashing has failed |
| Haze trapped inside a sealed glass unit | Glass unit assessment by its manufacturer or repair specialist | That an exterior caulk bead will clear the glass |
| Moisture continues through dry weather | Residual wet materials, condensation and other nearby water sources | That rain is the only source |
These are starting routes, not diagnoses. More than one fault can exist at the same opening. For example, clearing a drain won’t repair a failed joint behind the mounting flange.
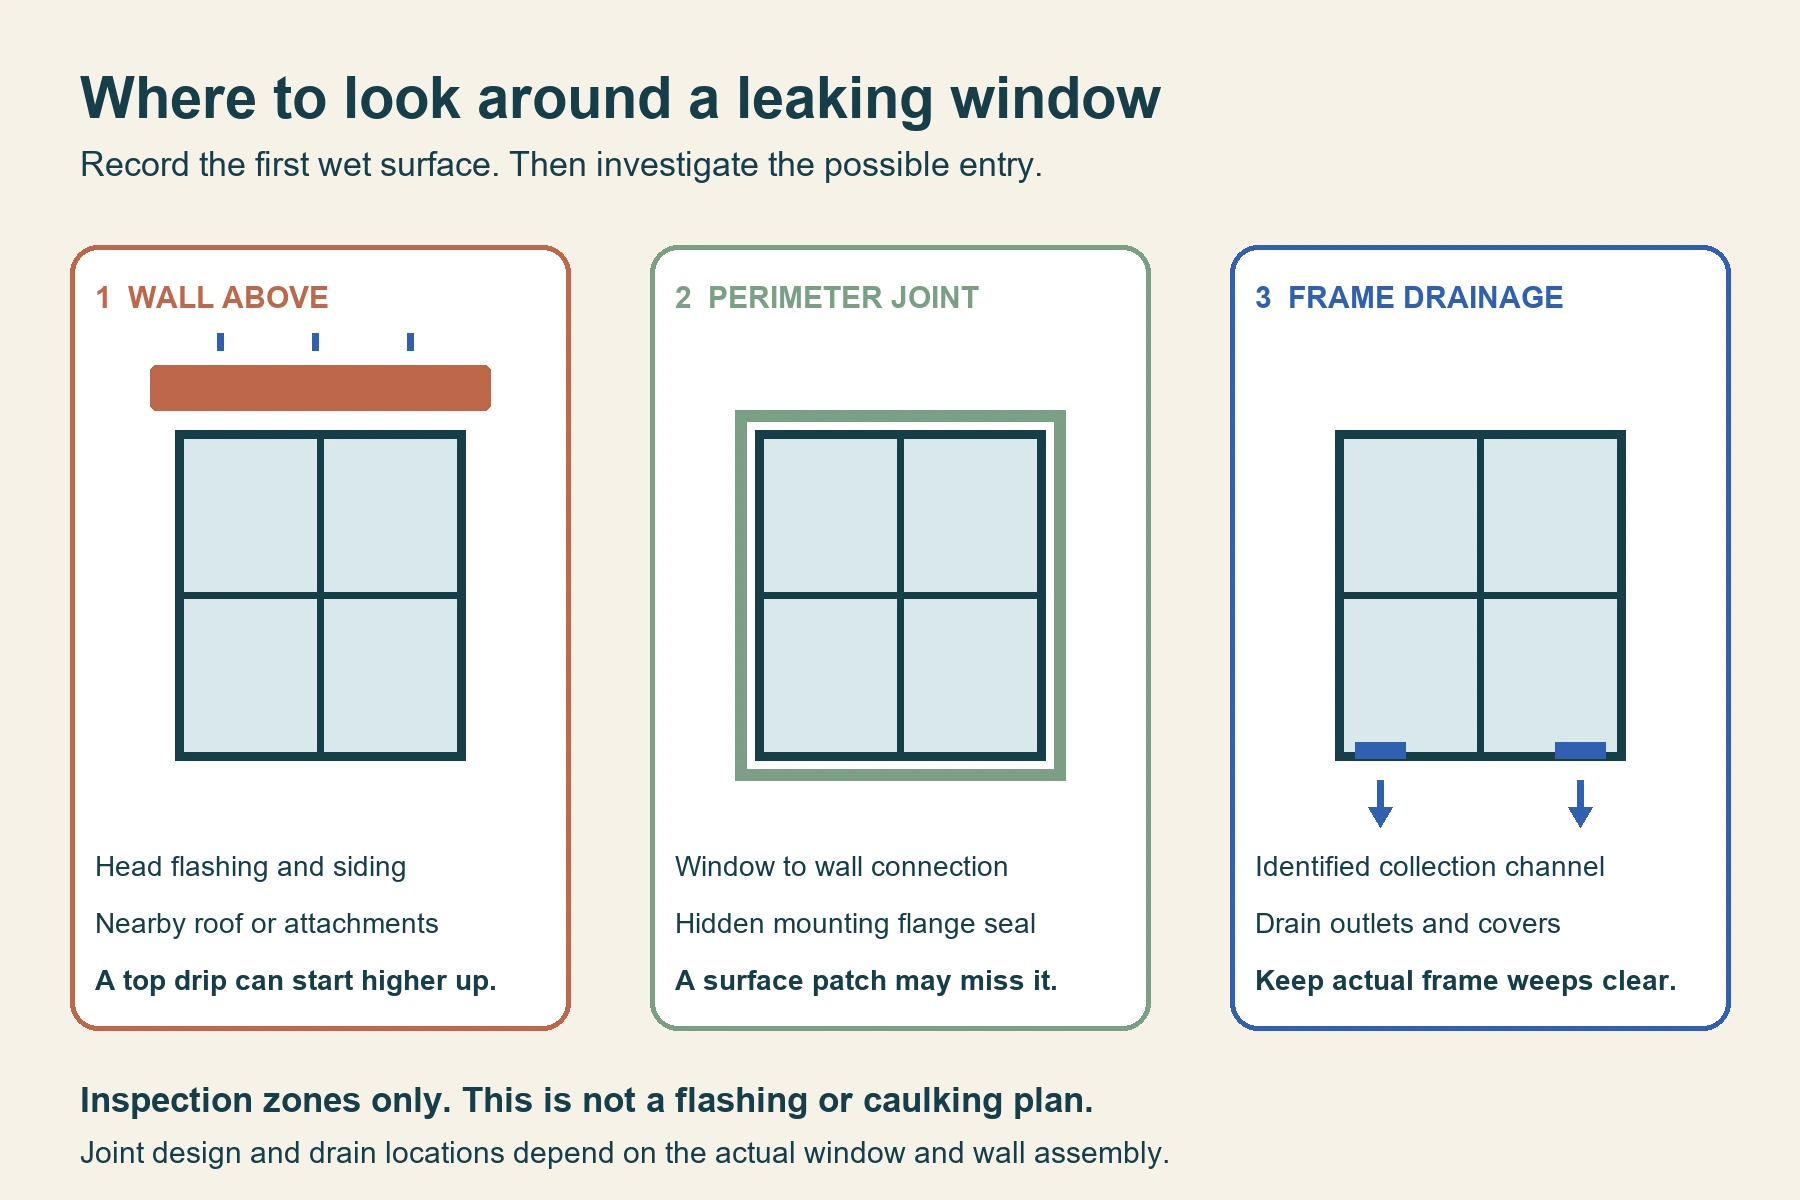
Protect the room before investigating
Move bedding, curtains, furniture and electronics away from the wet area. Catch drips in a container and blot accessible surfaces. Don’t stuff towels into the window track, where they could obstruct drainage or hide rising water.
Stay clear of wet outlets, switches and plugged equipment. If water reaches electrical components, arrange qualified electrical help. Don’t remove an outlet cover or probe a wet cavity to find the leak.
A swollen wall panel, sagging trim or soft floor needs more than a cosmetic seal. Avoid pressing hard, standing on a soft spot or pulling the window loose. Photograph the damage and arrange an assessment of the opening and surrounding materials.
Start drying promptly once the source is controlled. The EPA’s moisture guidance recommends drying wet materials within 24 to 48 hours. That is a prevention goal, not a promise that hidden materials are safe after surface drying.
Don’t paint or caulk over moldy material. Extensive growth, recurring wetness or hidden damage calls for appropriate cleanup and repair. A fresh interior paint coat shouldn’t be the first response to a leaking window.
Make a leak record while the evidence is visible
Take one photograph of the whole window and another of the first wet spot. Include the wall above, both lower corners and the floor below. An isolated closeup can hide the relationship between the stain and the opening.
Use a simple record for each event. You can copy these fields into a phone note and share it with a repairer.
- Timing: Date, rain start, first visible moisture and whether dripping continued after rain stopped.
- Weather: Light or heavy rain, noticeable wind direction and whether that wall was directly exposed.
- First wet surface: Glass, operating sash, lower track, interior trim, wall above or wall below.
- Window condition: Closed and latched, visibly damaged seal, recent installation or previous patch.
- Other changes: A new awning, siding work, a window air conditioner or recent work above the opening.
- Afterward: What dried, what stayed damp and whether the wet area expanded.
Record observations separately from explanations. Write “first drip at upper left trim” rather than “bad window seal.” The first description helps test several possible routes; the second can steer the repair too early.
For a mobile home window leaking only in strong wind, note that condition explicitly. A quiet rain afterward isn’t a useful comparison by itself. It may simply fail to expose the same weakness.
Separate rain entry from condensation and glass fog
Water you can wipe off inside
Moist indoor air can condense on cold glass and frames. Droplets may run onto the sill and resemble a small rain leak. Dry weather, cold surfaces and similar wetness on several windows make condensation worth checking.
Wipe the room side of the glass and note when droplets return. Check bathroom and kitchen moisture sources and whether ventilation is working. Keep a separate rain record rather than assuming condensation explains every damp patch.
Don’t use a single humidity reading as proof of the cause. Conditions can change between the leak event and the inspection. Water emerging from the wall during rain still deserves a water entry investigation.
Moisture you cannot wipe from either face
Fog between the panes of a sealed insulated glass unit points toward a glass seal issue. It is different from rain moving behind the window flange. A glass specialist can assess whether the glass unit, sash or complete assembly needs service.
Older separate storm panels create another space between layers of glass. Don’t assume that space is a sealed insulated glass unit. Identify the window construction before deciding that trapped moisture requires full replacement.
These distinctions keep two repair questions separate: why the glass looks cloudy and why the wall gets wet. Both problems may need attention, but exterior caulk isn’t a general cure for either.
Check frame drainage without sealing it shut
Many windows collect some water within an exterior frame or track and drain it outside. Small outlets near the bottom of the frame are often called weep holes. Dirt, paint or previous caulk can block them.
Identify the outlets through the window instructions or manufacturer before disturbing anything. Some have covers or internal passages. A random gap, screw hole or seam isn’t automatically a drain.
The window drain maintenance guide shows how blocked passages can trap water. For an identified, accessible passage, gently remove loose debris with a suitable small brush. Follow the window’s care instructions and avoid damaging covers or pushing dirt deeper.
Where the instructions allow a drainage check, introduce a little water into the designated collection channel. Watch for discharge outside and stop if it backs up or enters the room. Don’t fill an unknown cavity or drill a new outlet.
A successful drain check establishes a working outlet at that moment. It doesn’t test the surrounding wall or prove performance during a storm. Keep investigating if the wall still becomes wet.
Look above a window that leaks at the top
When water appears at the interior head, include the wall above in the inspection. Rain can enter higher up and emerge at the opening. The visible drip tells you where water escaped, not necessarily where it entered.
From a safe position, photograph the top trim, siding joints, visible flashing and nearby attachments. Note loose edges, open joints or a previous repair that directs water toward the window. Don’t climb onto a wet roof or remove siding during a storm.
Flashing is material arranged to shed water away from vulnerable joints. It must connect properly with the wall’s water protection layer. An attractive bead at the window face can’t correct every hidden overlap or missing connection.
A repairer may need to expose the window head and surrounding siding to trace that connection. Ask what the proposed repair changes in the water path. “Add silicone” is incomplete if nobody has identified the actual joint or entry.
A roof edge, roof penetration or attachment above may need its own specialist. Mention wet ceiling edges or wall stains above the window when booking the visit. Those clues help avoid treating the window as an isolated component.
Distinguish three places people call the window seal
The word “seal” can describe several unrelated parts. Before buying a tube or replacement strip, point to the exact place that needs service.
| Location | Its role | Repair boundary |
|---|---|---|
| Operating sash against its frame | Weatherstripping helps the moving panel close against the frame | Match the profile and correct closing problems; don’t glue the sash shut |
| Glass within the sash or fixed frame | Glazing materials hold and seal the glass according to that window system | Glass service needs the exact construction, not a generic exterior smear |
| Window mounting flange against the home | The installation joint connects the window to the exterior water control system | Assess backing seal, flange condition, substrate and flashing together |
A sash that won’t latch can leave its weatherstripping poorly compressed. Clean accessible tracks and check operation as the owner instructions allow. Don’t force hardware or tighten mounting screws until the frame bends.
If the frame has distorted or separated, record that condition for the installer. More force may hide the symptom while making operation worse. Use our doors and windows planning guide to identify the component before ordering parts.
Why caulking the whole perimeter can make matters worse
A frame drain and the bottom joint behind a mounting flange are different locations. Advice about one mustn’t be applied blindly to the other. Even correct general advice can become wrong when it moves to a different joint.
Some drained opening details intentionally leave a route below the window for water to escape. Certain manufactured housing window instructions specify backing sealant behind their mounting flanges. The assembly’s approved detail decides where sealant belongs.
For example, the Lippert vinyl window installation instructions describe backing sealant at the mounting flange. They also address opening preparation and exterior weather protection. That named system doesn’t create a caulking rule for every older aluminum window or replacement installation.
Don’t fill every visible bottom gap “just in case.” Equally, don’t strip the whole bottom mounting joint because another window drains differently. Preserve identified frame weeps and have uncertain perimeter details checked against the actual installation instructions.
When a limited exterior sealant repair makes sense
A local repair may be appropriate when the identified joint calls for sealant and its supporting materials remain sound. Confirm compatibility with the frame, siding and existing materials. Follow the sealant instructions for preparation, joint shape, weather conditions and cure.
Remove failed material using an approved method rather than burying it under another layer. Don’t spread sealant over damp damage, loose paint or dirt. A broad surface patch doesn’t recreate a missing seal behind a flange.
Before scraping painted surfaces on a home built before 1978, address possible lead paint. Plan appropriate lead safe work rather than dry sanding old coatings. Removing a window can disturb both interior and exterior finishes.
When the window needs removal and resetting
A failed backing seal, damaged mounting flange or wet opening may require removing the unit for access. This is different from replacing otherwise serviceable glass and hardware. A qualified installer should assess the opening before promising that a reset will solve it.
Ask whether the work includes damaged substrate, suitable flange support and the connection to the wall’s water protection layer. Reinstalling over decayed material leaves part of the problem in place. Interior trim should wait until the water source and drying needs are addressed.
Use moisture readings as clues, not a diagnosis
A moisture meter can help compare accessible areas around the opening. You can also ask a repairer to map readings while assessing hidden damage. Buying a meter isn’t required to make the initial leak record.
The Klein Tools ET140 is one example with important limits. Its drywall and masonry readings use a relative scale, not a wood moisture percentage. Its sensing depth reaches up to 3/4 inch.
Thin wall panels can let the reading include material behind the face. Compare the same type of assembly using the correct material mode. Don’t treat a single high number as proof of mold, a failed stud or a specific entry point.
Keep that meter away from areas with energized conductors. A low surface reading also doesn’t certify a whole wall cavity dry. Leave opening decisions and concealed damage assessment to the person responsible for the repair.
For useful documentation, mark reading locations on a sketch and repeat them under comparable conditions. Record the instrument and material setting. A pattern is more informative than an unlabeled photograph of a display.
Decide between maintenance, resetting and replacement
A mobile home window leaking at one location doesn’t automatically need a complete replacement. Ask which defect the work will correct and what evidence supports that choice. Separate the window’s condition from the surrounding wall’s condition.
- Maintenance route: Identified drainage blockage or a serviceable operating part, with no unresolved wet wall damage.
- Installation repair route: A repairable window with a failed perimeter connection or accessible flashing defect.
- Window replacement route: Damage or unavailable parts prevent a dependable repair, or a suitable replacement is the chosen upgrade.
- Wall or roof repair route: The entry or damage extends beyond the window assembly, requiring coordinated work.
For replacement decisions, compare the mounting system and installation requirements in our manufactured home window selection guide. A new window still needs a sound opening and correct water management. Replacing the unit alone doesn’t repair every possible leak above it.
Record the label and dimensions before requesting a quote. Our window measurement guide separates frame, flange and rough opening measurements. Don’t order from the visible glass size or assume the home’s age identifies a standard fit.
Retain the opening’s required escape function when planning work. Don’t cover an emergency exit window with a permanent patch or obstruct its controls. Have changes to the opening, glazing or escape arrangement checked before installation.
Rain guards, awnings and temporary patches
A guard or awning may reduce how much rain reaches the opening. It doesn’t establish that the frame, flashing and wall behind it are sound. Treat the underlying leak separately before deciding on an accessory.
Attachments also need suitable support and weather protection at their own fasteners. Don’t drill into a window flange or wall simply to hang a generic guard. The installation must suit the home, window and accessory.
Temporary exterior covering needs the same care. Avoid blocking drainage, trapping water against the wall or obstructing an escape window. If safe placement isn’t clear, protect belongings inside and arrange prompt help.
A window air conditioner creates additional joints and installation requirements. If the leak began after installation, identify the appliance and review its mounting and drainage instructions. Don’t drill its case, change its slope or seal openings based on another model’s advice.
Confirm the repair before closing the wall
Ask the repairer to explain how the entry was located and how the repair was checked. Controlled water testing may help, but pressure and application matter. A hose blast into seams isn’t a dependable substitute for a planned test.
Keep photographs of exposed damage and completed flashing or backing joints before they disappear behind trim. Request the window and sealant details used, along with any care instructions. These records make future service easier.
Afterward, check sash movement, latching and drainage again. Revisit the original wet locations after comparable weather. Note whether the wall is drying rather than judging only by the absence of an immediate drip.
If moisture returns, give the repairer the original record and the new observations. Specify whether it returned at the same first wet surface. A successful repair should explain the water route, preserve drainage and address the damage it caused.
Found a detail that needs checking? Tell us about a correction.