

To replace mobile home door assemblies successfully, match the new unit to the actual opening and its installation system. Inspect the threshold support and surrounding wall before committing to the job. Then follow the instructions for that exact door, with checks before removal, fastening and final trim.
The hardest mistake to undo is finding a problem after the old door is out. A replacement can look right yet need different anchorage, wall depth or weather protection. This guide follows a complete exterior door replacement from the first inspection through the final operating checks.
Before you replace mobile home door assemblies, define the job
A complete assembly includes the door panel, its surrounding frame and the threshold across the bottom. A slab replacement changes the panel while keeping the existing frame. Replacing exterior trim or a storm door is another job again.
Write down which parts you intend to remove. Include the storm door if it shares the assembly. This prevents an order for a single panel when the damaged frame also needs replacement.
| What you find | Decision to make | What needs confirmation |
|---|---|---|
| The panel is damaged but the frame appears sound. | Ask whether a compatible replacement panel is available. | Hinges, hardware preparation, thickness, seals and fit within that exact frame. |
| The frame, threshold or assembly is damaged. | Plan an assessment for complete unit replacement. | Opening condition, attachment method, wall depth and required repairs. |
| The door rubs or will not latch. | Identify the cause before buying an assembly. | Panel condition, frame alignment and any evidence of broader home movement. |
| You want a taller, wider or different swinging door. | Arrange an alteration assessment before ordering. | Structural opening, access clearances, applicable approvals and the proposed door system. |
A fresh assembly does not correct a failing opening. Water damage below the threshold or movement around the doorway can undermine a new installation. Have those conditions assessed rather than fastening a new frame over them.
This workflow covers an exterior front, rear or side door. It does not provide instructions for enlarging an opening, cutting a header or modifying home supports. Those decisions need a qualified manufactured home contractor and any applicable approval.
1. Build a record while the existing door still closes
Photograph the door from inside and outside. Take closer views of the hinges, threshold, upper trim, lower corners and any visible label. Include a wider view showing the landing, steps, overhang and nearby obstructions.
Record how the old door behaves before disturbing it. Does it drag across the threshold, rub near a corner or require lifting to latch? Note whether the problem changes with weather or affects other doors too.
These observations help separate an assembly problem from an opening problem. Elixir’s installation guidance connects door operation with proper home setup and support. A qualified assessment is appropriate when several openings shift or the doorway appears racked.
Look at accessible surfaces around the threshold and lower frame. Staining, swelling, separated trim or a soft floor deserves further inspection. Those signs do not establish the full extent or cause of concealed damage.
Do not remove structural pieces just to explore. An installer can explain which trim can come off for measurement and what must remain intact. Keep the home secure and weather protected during that preliminary inspection.
2. Confirm fit using the new door’s definitions
The rough opening is the opening in the home that receives the door assembly. The panel width, frame outside width and size printed on an order form can describe different things. Label every measurement with its endpoints.
Measure accessible opening width at the top, middle and bottom. Record height at both sides and check the diagonals. An installer should confirm hidden endpoints before you treat those numbers as an order.
Keep wall depth, frame depth and threshold details alongside width and height. Photograph the measuring tape in position when possible. A supplier can resolve a labeled photograph more reliably than an unexplained pair of numbers.
Do not round a measured panel to the next familiar catalog size. A manufacturer’s call size is an ordering designation, and its relationship to the opening must be checked. The old panel alone cannot settle the fit of a complete replacement assembly.
Ask the supplier to confirm these items against the exact product drawing:
- The required rough opening and its permitted tolerances.
- The assembly’s actual outside dimensions and mounting surface.
- The jamb option, wall depth and interior finishing arrangement.
- The threshold profile and required support underneath it.
- The swing direction, hinge side and viewpoint used to name the hand.
- The included panel, storm door, lock preparation and installation hardware.
Use a sketch as well as a handedness label. Mark inside, outside, hinge side and the arc of each moving panel. This matters particularly when an inner entry door and outer storm door swing in different directions.
Check the proposed swing against the landing, railing, light fixture and interior furniture. Confirm that the handle and any storm door can operate together. A matching opening size does not answer those clearance questions.
If a conventional residential unit interests you, have its complete installation requirements compared with the home. A door sold through a home center is neither automatically suitable nor automatically unsuitable. Fit, support, anchorage and the applicable alteration requirements decide.
3. Identify the installation system before assembling supplies
A mounting flange extends around the frame and provides specified attachment locations against the exterior opening perimeter. A side jamb system also uses attachment through the jamb into the surrounding framing. The exact manual defines which fasteners carry the assembly and where they belong.
Do not classify a door solely by the decorative trim visible from outside. Ask the supplier which installation document matches the model being delivered. Confirm that the document covers manufactured housing and the proposed mounting system.
| System or document | What the instructions establish | What must not be borrowed |
|---|---|---|
| Kinro flange mounting instructions | Flange preparation, designated mounting holes, sealing and a fastening sequence. | A generic screw list or a side jamb attachment sequence. |
| Kinro side jamb mounting instructions | Temporary positioning, jamb fastening, conditional shimming and brickmold finishing. | The assumption that exterior trim fasteners alone complete the installation. |
| Elixir series instructions | Separate sections for regular outswing and combination door assemblies. | A procedure from another series because its photograph looks similar. |
The Lippert Building Products document library lists flange and side jamb instructions separately. It also labels the 5500 series discontinued. An available download is not proof that its product is a current replacement choice.
The instructions may reflect factory construction, field service or a particular approved assembly. Ask how they apply to your existing wall. If an instruction requires rebuilding part of the opening, an installer must resolve that before proceeding.
A useful supply list therefore begins with the manual. Take its specified fastener types, attachment locations, sealing materials and hardware requirements to the supplier. Select protective equipment and enough lifting help for the actual assembly.
Do not rely on a universal screw length. Wall materials, frame construction and required penetration can differ. Reusing old fasteners also needs the manufacturer’s approval and a sound attachment surface.
If you plan to replace mobile home door units yourself, read the complete instructions before deciding the work is manageable. Resolve any unclear requirement with the supplier. Arrange qualified installation when the opening, wall connections or required repairs exceed your skills.
4. Plan water protection before demolition
Map how the new frame will meet the existing siding and water control layer. Include the top, both sides, the threshold and the lower corners. Each connection needs an installation detail that fits the actual wall.
The sill is the bottom of the frame or opening. A drip cap redirects water above the door, while flashing manages water at assembly connections. The exact system determines the parts, sequence and sealing locations.
Have the installer explain which siding or trim must be removed to make those connections. Covering a concealed gap with fresh trim does not establish a sound sealing surface. The plan should address the wall behind the trim too.
Choose sealant or tape from the assembly’s requirements and the material maker’s instructions. Confirm surface preparation, adhesion, installation temperature and working time. Do not treat every door tape or exterior caulk as interchangeable.
The Kinro manuals warn that pumpable sealant can form a skin before the assembly is installed. That makes installation timing part of the job. Prepare the opening and lifting plan before applying a material with limited working time.
Ask which paths must remain open for drainage. Seal the locations required by the approved detail without inventing extra beads across openings. A visible gap can have a purpose that an exterior photograph does not reveal.
Elixir’s door installation and drip cap documents distinguish several assemblies. Use the instructions for the selected series, including any applicable pan or cap detail. A general diagram cannot replace that model specific plan.
5. Pass the readiness check before removing the old unit
Schedule removal only after the replacement has arrived and been inspected. Compare its model, dimensions, hand, frame depth and included hardware with the confirmed order. Check the frame and mounting surfaces for shipping damage.
Keep the shipping spacers and clips where the applicable instructions require them. They can preserve alignment between the panel and frame during installation. Removing them early to try the door can disturb that relationship.
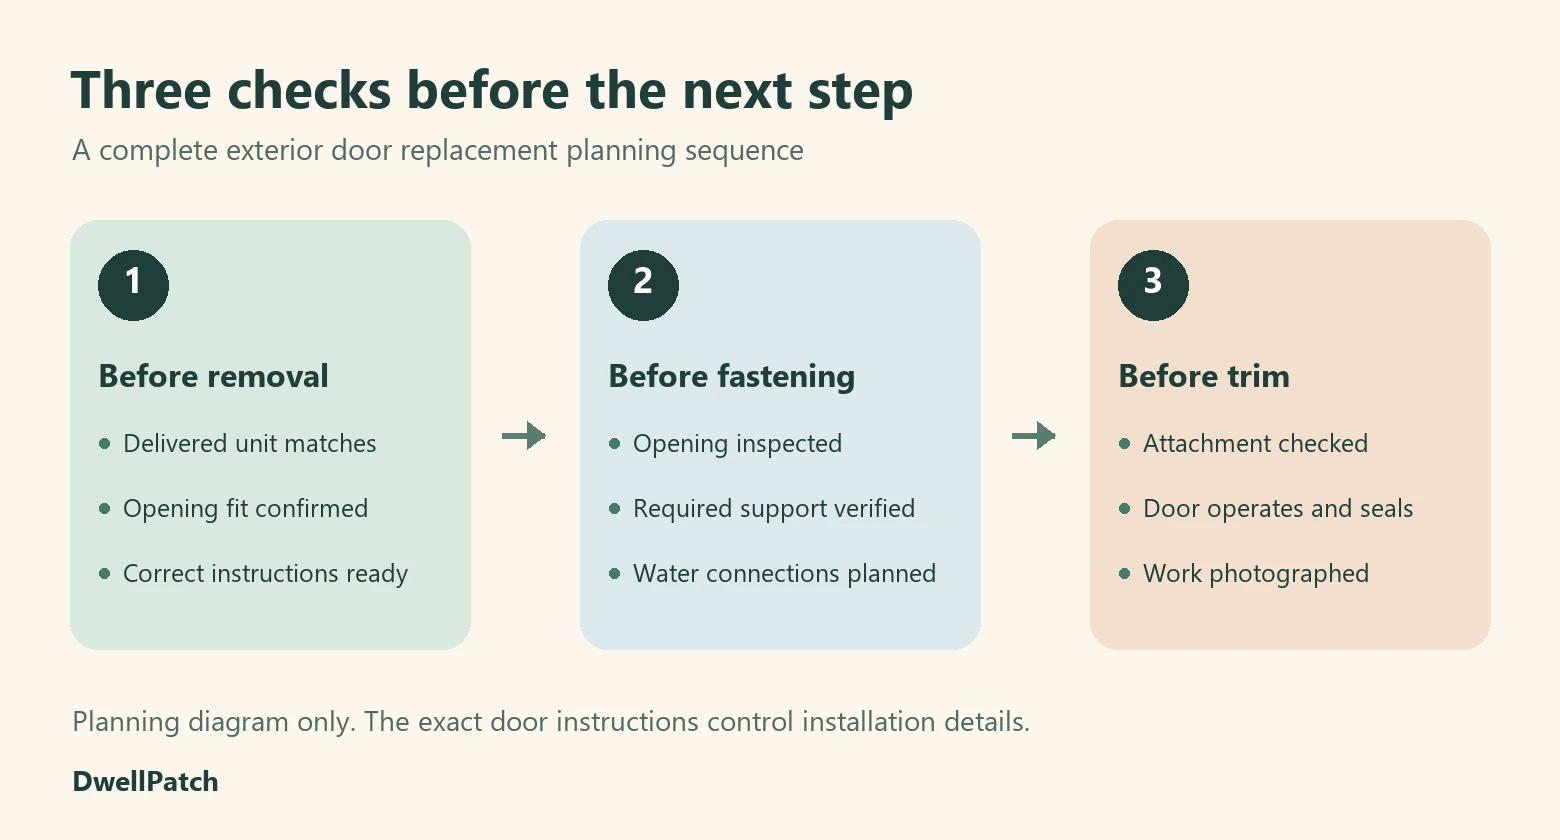
Use this readiness checklist before the work begins:
- The delivered unit matches the supplier’s confirmed drawing and opening requirements.
- The correct instructions are available, including separate hardware and weather protection details.
- Required materials and compatible fasteners are on site.
- The installer has a plan for concealed damage and any additional repair work.
- Conditions suit the installation materials, and temporary weather protection is ready.
- There is a safe carrying route, suitable lifting help and a secure closing plan.
Discuss what happens if concealed damage prevents completion that day. Agree who will assess it and how the opening will be secured. Do this before the existing assembly loses its attachment.
If you hire an installer, ask for a scope that separates replacement from possible wall or floor repair. Confirm who handles siding, flashing, trim, disposal and finishing. A door installation quote can otherwise leave important connections undefined.
6. Remove the assembly without hiding what you find
Removal needs to follow the existing assembly’s attachment arrangement. Supports and lifting help must be in place before its final fasteners are released. A complete door can shift when the attachment is removed.
Have the installer expose and identify the fasteners rather than pulling against concealed attachments. Protect adjacent finishes that will remain. Follow the applicable plan for separating trim and weather protection layers.
Once the unit is out, photograph the bare opening before covering anything. Include the lower corners, sill support, side framing and exterior mounting face. This creates a record of what the replacement will attach to.
Inspect the newly exposed material for decay, damage, loose attachment surfaces and unresolved water paths. Remove failed sealing material as required for the new system. The prepared surface must meet the manufacturer’s instructions.
Stop if the opening cannot provide the required support or attachment. Do not bridge a soft area with extra screws, foam or trim. Arrange the repair, then remeasure the finished opening before installing the door.
A changed opening may invalidate the measurements used for the order. Confirm the repaired dimensions and geometry against the new assembly again. The delivered door should not dictate an improvised structural alteration.
7. Set and fasten the door using the matching manual
Begin with the opening checks required for that unit. They may include level, square, diagonal measurements and a flat mounting face. Use the published tolerances rather than a general rule from another brand.
Confirm threshold support before positioning the assembly. The sill must bear as the installation detail requires. Filling a concealed space later is not a substitute for establishing that support first.
For a flange system, follow its flange sealing, positioning and designated fastener sequence. Keep the mounting face flat and avoid distorting it through overtightening. Complete the required attachment rather than stopping when the frame appears secure.
For a side jamb system, follow its positioning and jamb attachment sequence. Use shims only at the locations and conditions it specifies. Do not substitute the flange procedure or assume exterior trim screws provide all required anchorage.
Both the location and purpose of a shim matter. A shipping spacer that preserves the panel gap is different from a support shim behind a jamb. Forcing material into an unneeded gap can change the frame’s shape.
The Kinro side jamb mounting instructions warn against head shims that transfer header loads to the door. They also caution against overpacking insulation or bowing the frame with expanding foam. These are assembly instructions, not permission to redesign an opening.
Check alignment at the stages the manual requires. Watch the reveal, meaning the visible gap between the panel and frame. Uneven contact, binding or a changing gap needs correction before the installation is concealed.
Install the lock, strike plates, closer and other hardware with their matching instructions. Keep drainage features in their required orientation. Do not drill additional holes simply because an old unit had them.
8. Inspect the installation before final trim
Trim should come after the required attachment, sealing and operating checks. Walk through the work with the installer while the critical connections remain visible. Ask about anything that differs from the agreed instructions.
| Checkpoint | What to record | Reason to stop and resolve it |
|---|---|---|
| Opening and support | Condition photographs and required geometry checks. | Damaged material, uncertain sill bearing or an opening outside the applicable tolerance. |
| Attachment | Locations and fastener specification from the matching manual. | Missing attachments, distorted frame surfaces or an unexplained substituted method. |
| Water protection | Visible connections at the head, sides and threshold. | Unresolved gaps, damaged layers or blocked drainage. |
| Operation | Panel movement, latch engagement and weatherstrip contact. | Dragging, slamming, lifting to latch or inconsistent sealing. |
| Completion | Hardware, finishing instructions and care documents. | Unfinished required work or a temporary fix presented as the final repair. |
Open and close the entry door through its intended travel. Check that it latches without lifting the panel or forcing the handle. Test the lock from inside and outside using its operating instructions.
If there is a storm door, test it separately and together with the entry door. Check closer operation, handle clearance and interference between the panels. Resolve binding before calling the installation complete.
Look for continuous weatherstrip contact where the design requires it. Check that the threshold area and exterior connections match the installed system. A door that latches can still have an unresolved sealing problem.
Follow any specified water testing procedure and its timing. Do not use a pressure washer as an improvised leak test. Sealant curing requirements and the actual assembly determine when and how testing is appropriate.
After replacement: keep a useful record
Save the order confirmation, model label, instructions, warranty and installation photographs together. Include the fastener and sealing product details if the installer supplies them. That information helps identify parts and assess future changes.
Follow the maker’s finish and maintenance requirements. Keep paint off components the instructions exclude. Check the assembly after the first rain for visible water entry and report any problem promptly.
If the door begins binding later, record where and when it happens. Tell the installer about related changes in floors, trim or other openings. Avoid repeatedly moving the strike plate before the cause is understood.
When you replace mobile home door units, the useful finish line is a supported, correctly attached assembly that operates and seals properly. Keep the inspection record, not just the receipt. It shows what was checked before the new trim covered the work.
Found a detail that needs checking? Tell us about a correction.