

A screen door for mobile home use has to match the existing doorway, mounting system and door swing. Start by identifying what you need: an added screen door, a replacement outer door for an existing combination entry, or a patio slider screen. Those are different orders, even when their advertised sizes look alike.
You may need less than a whole new door. Torn mesh, a failed closer and a damaged frame call for different repairs. Sort out the damaged part before comparing door sizes or materials.
The door and window component guide helps put a larger opening repair in context.
Choose the right kind of screen door for mobile home use
“Screen door” can mean the entire outer door or just its screened insert. Use the descriptions below when talking with a supplier. A photo of the full entry helps prevent an expensive misunderstanding.
| What you have or want | What to ask for | What needs confirmation |
|---|---|---|
| A separate hinged outer door with mesh | A complete hinged insect screen door and its mounting hardware | The opening, mounting surface, hinge location, latch and closer clearance |
| An outer door with glass and a screened ventilation section | A storm door with the ventilation style you want | Exact model dimensions, glass and screen arrangement, mounting and handle space |
| A main entry and outer storm door supplied as one combination assembly | The replacement outer component for that entry assembly | Existing entry manufacturer, model, frame, hinge and latch compatibility |
| A sound outer door with a torn screen | Replacement mesh, a screen insert or a specified retractable screen part | Which screen construction the door uses and whether the retaining parts remain sound |
| A sliding glass patio door with a separate sliding screen | A patio screen matched to the patio door system | Panel dimensions, track, rollers, latch and manufacturer compatibility |
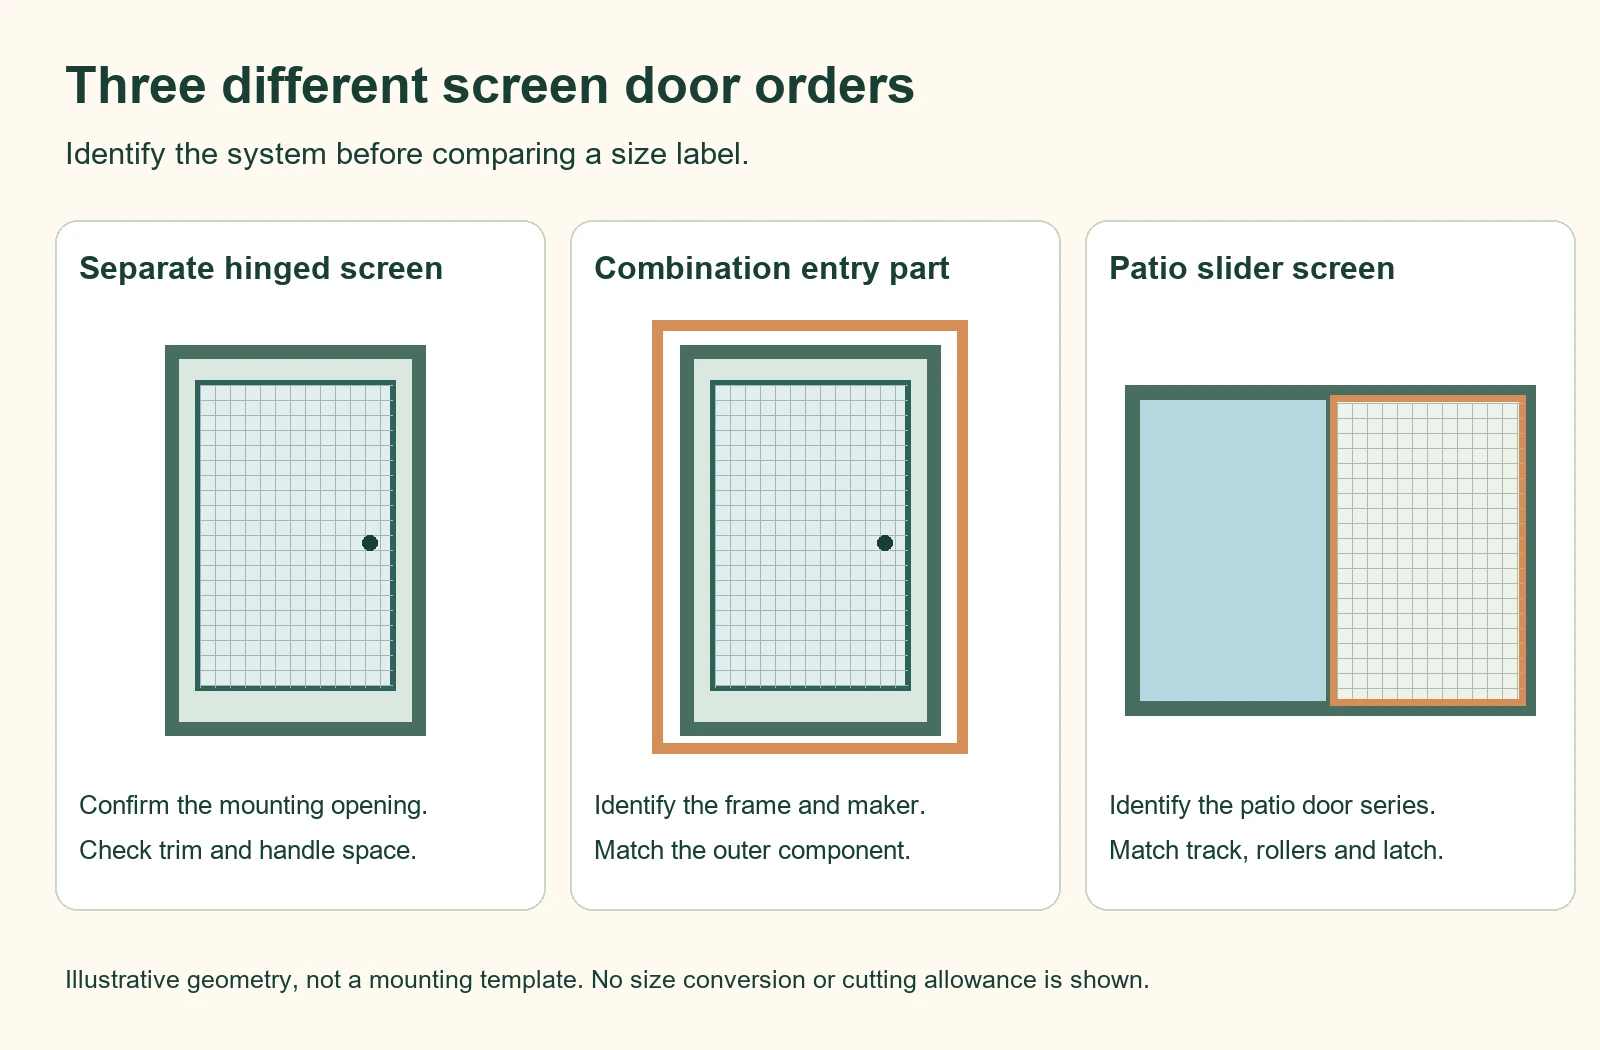
A plain insect screen lets you use the entry for ventilation. A storm door adds glass, with a screen arrangement that varies by model. Neither description tells you how that product attaches to your home.
For example, some storm doors have interchangeable glass and screen panels. Others have a sliding glass panel that reveals a retractable screen. Decide which operation suits you before looking at decorative styles.
Keep the primary entry door in the conversation. If it swings outward, show that movement to the screen supplier before selecting another outward swinging assembly. Do not assume a product shown in front of an inward swinging door will suit your entry.
Check whether the existing door can be repaired
Inspect the mesh, screen insert, outer door and entry frame separately. A hole in the fabric does not mean the hinges or frame have failed. Conversely, new fabric will not straighten a damaged door.
Torn mesh in an otherwise usable frame
Look at the edge of the screen. Many conventional screens use spline, a flexible cord pressed into a groove to retain the mesh. If that construction is intact, replacing the mesh may avoid a complete door order.
Keep the old spline and note the groove dimensions before buying materials. Mesh thickness affects spline selection. Phifer specifies smaller spline for several thicker screening products, so changing fabric can change the cord you need.
A retractable screen requires a different check. Identify the exact door and replacement assembly before taking apart its housing. A roll of ordinary screening does not establish that the retracting mechanism can be repaired with it.
A missing or bent removable insert
Ask whether the maker supplies the complete insert and its retainers. Record the insert size separately from the outer door size. Include photos of its edges, clips and any identifying label.
A panel that nearly fills the opening is not a confirmed replacement. The way it seats and stays retained matters too. Have the supplier verify those details rather than ordering by width and height alone.
A door that drags, slams or will not latch
Watch where the trouble occurs without forcing the door. Does the lower corner rub, does a bracket move, or do the handles touch? Describe that observation before buying a closer or a replacement door.
| What you notice | What to inspect or document | What it does not prove |
|---|---|---|
| The door rubs near the sill | Location of contact, visible hinge movement and frame gaps | That a stronger closer will correct the alignment |
| The door shuts sharply | Closer model, visible leakage or damage, bracket condition and its adjustment instructions | That every replacement cylinder will fit the existing brackets |
| The latch misses its keeper | Whether the door is aligned and whether the keeper or mounting surface moves | That moving the keeper alone addresses the underlying problem |
| A bracket pulled away after wind damage | Bracket, fastener holes, door material and mounting surface damage | That another closer can serve as a wind restraint |
| The outer door stops before closing | Actual contact point, including handles, closer or trim | That the advertised width or height is the only fit problem |
Treat this table as an observation checklist, not a diagnosis. Stop using a damaged assembly if it cannot be controlled safely. Arrange assessment when the supporting frame, trim or fastener locations have deteriorated.
Measure the opening the selected product actually uses
There is no reliable rule that converts every mobile home entry size into a screen door size. Keep the old door’s measured dimensions, the mounting opening and the home’s rough opening as separate records. Let the selected product’s instructions determine which record controls the order.
A separate outer door mounted to exterior trim
Brickmold is the exterior trim around an entry, even where the home has no brick siding. Some added storm doors mount to this trim. Their measuring instructions use the space where the new rails will sit.
For that system, measure the width at the top, middle and bottom between the specified inside trim faces. Record every reading and mark the smallest. Measure height from the sill to the upper trim at the locations the selected instructions show.
Use the manufacturer’s opening and trim measuring diagram for its matching door family. Do not measure across an old metal rail and assume that edge is the new mounting boundary. If the old assembly hides that boundary, ask the supplier how to obtain it before ordering.
Take a photo of each tape position. A number labeled “width” leaves room for confusion. A photo showing both tape ends lets the supplier see what you actually measured.
The outer component of a combination entry
Begin with the existing entry label and any available paperwork. Ask whether the supplier is quoting an outer component or a complete main entry assembly. Those quotes should not be compared as though they contain the same parts.
Have the supplier explain its call size. It might reference the associated entry assembly rather than the moving outer panel you measured. Obtain a drawing or written dimensions for the actual component and its attachment points.
Do not add an assumed allowance to the old panel. Also avoid transferring the rough opening instructions for a complete entry to a replacement screen component. A familiar size label cannot resolve an unidentified mounting system.
A sliding patio screen
Identify the patio door brand and series first. Record the screen panel’s dimensions, roller arrangement, latch position and track profile for the supplier. A hinged entry screen measuring guide will not establish patio screen compatibility.
Even a manufacturer’s accessory may serve only certain series or production dates. Andersen’s patio screen guidance, for example, distinguishes compatible models and excludes some other configurations. Treat a claimed universal patio screen fit as something to verify against your exact track and door.
Check mounting strength, depth and handle clearance
Width and height describe only part of the fit. The mounting face must also suit the rails and their fasteners. The space between doors must accommodate the hardware.
Confirm a usable mounting surface
Compare the front face and depth of the exterior trim with the selected installation diagram. For one LARSON installation system, the instructions require a mounting surface 1 inch wide and 1 inch deep. That is a requirement for that system, not a universal mobile home rule.
Measure these surfaces independently. A wide trim board does not establish its depth, and decorative covering does not establish sound support behind it. Ask an installer to assess loose, damaged or questionable mounting material.
A door that fits the opening can still be a poor purchase when the necessary support work remains unknown. Obtain that assessment before placing a custom order. Keep any proposed trim or frame work separate in the quote.
Make sure the two handles can pass
Record the entry handle’s projection and height. Compare those with the proposed outer handle and its mounting position. Check the space occupied by the glass or screen frame too.
Ask the supplier to review a side view photo of the closed entry. Its handle may project into the proposed outer door’s space. Do not assume different handle heights eliminate every possible contact point.
For a screen door for mobile home use, request confirmation of both closed clearance and movement through the opening arc. A door must work while someone operates the latch, not merely sit inside the frame. Use the proposed model’s template when available.
Record swing in plain language
Stand outside and photograph the entry closed and open. Write down the hinge side, handle side and direction of movement. Then use the supplier’s diagram to select its handing designation.
Do not order from “left” or “right” alone. Those words need a viewpoint and a defined reference. Send the labeled photo along with the order.
Include the nearby railing, steps, landing, light and wall in a wider photo. Ask whether any of them obstruct the proposed door’s travel. Changing an opening or access structure to accommodate a door calls for an appropriate assessment.
Select screen and ventilation features by the problem you need to solve
Separate the door frame material from the mesh material. “Aluminum door” describes an assembly or frame, while the screen inside may use a different material. Ask for both specifications.
| Your priority | What to look into | What to verify before choosing |
|---|---|---|
| Ordinary insect screening | Standard fiberglass or aluminum screening approved for the frame | Mesh retention, available replacement material and suitable spline |
| Repeated claw damage | A documented pet resistant screening material | Compatibility with the insert and retaining system, plus the limits of the durability claim |
| Very small insects | Screening specifically intended for smaller insects | The actual fabric specification and whether it suits this door assembly |
| Seasonal glass and screen use | An interchangeable storm door panel system | Panel handling, storage, retainers and replacement availability |
| Ventilation without storing a loose panel | A sliding glass and retractable screen arrangement | Screen service parts, operating instructions and the size of the ventilating section |
Pet resistant describes resistance to damage, not proof that an animal cannot escape. Likewise, an insect screen is not a fall barrier or a security door. If containment or security is the goal, seek a system specifically intended for that purpose.
For smaller insects, compare the mesh specification rather than the door’s decorative style. Phifer offers screening specifically described for tiny insects. That does not mean every screen sold with a mobile home door has the same fabric.
Choose storm door glass operation based on how you will use it. An interchangeable panel requires somewhere safe to keep the unused panel. A retractable arrangement avoids that swap but brings its own model specific service parts.
Ask what can be replaced later: mesh, insert, retainers, latch, hinges and closer. A clear parts diagram is useful evidence during the purchase. Keep a copy with the door model and receipt.
Use this order worksheet before paying
Send one completed record to each supplier. It makes competing quotes easier to compare and exposes unanswered fit questions. Leave an unknown item marked unknown rather than filling it with a guess.
| Record | What to send or request |
|---|---|
| Assembly type | Separate hinged screen, storm door, combination entry component or patio screen |
| Existing identity | Manufacturer, model, label photo and any available part number |
| Measurement reference | The proposed product’s drawing, with the measured faces marked |
| Opening readings | All required width and height readings in inches, including fractions |
| Old moving panel | Actual measured panel dimensions, labeled separately from opening dimensions |
| Mounting conditions | Trim face, depth, condition and photos of existing rails or hinges |
| Hardware space | Entry handle height and projection, proposed handle template and closer space |
| Swing | Outside view showing hinges, handle, opening direction and nearby obstructions |
| Included parts | Rails or frame, hinges, latch, closer, sweep, screen and glass as applicable |
| Order confirmation | Exact model, actual dimensions, fit range, finish, handing and any custom requirements |
| Delivery and returns | Shipping method, damage reporting process and custom order return terms |
Ask one direct question before authorizing the order: “Do these measurements and photos meet this exact model’s installation requirements?” Keep the answer with the quote. If the seller needs another measurement, obtain it before choosing the size.
For a custom screen door for mobile home installation, request the finished dimensions in writing. Also ask which components arrive assembled. A custom dimension does not resolve an incompatible hinge, latch or mounting surface.
Do not compare only the door price. Compare the complete scope, including omitted hardware, delivery and any required mounting repairs. No single price estimate can stand in for those differences.
Plan the installation around the exact door instructions
Read the instructions before the old assembly comes off. Identify the rail locations, fasteners, clearances and drilling limits for the new model. Check that the supplied parts match that manual.
A trim allowance shown for one part is not permission to shorten the entire door. Do not cut down a storm door, glass assembly or frame unless its manufacturer explicitly permits that exact alteration. Ask for another size or an approved alternative when the specified fit range does not match.
Closer geometry also belongs to the selected system. For example, Touch n Hold distinguishes single and dual kits in its installation instructions. It also warns against drilling through the door’s outside surface when attaching its door bracket.
Use the matching closer installation instructions when identifying that hardware. They illustrate why an old bracket’s holes cannot establish universal fit. This is an example of a documented system, not a recommendation for every door.
Once installed, check the operation the manual calls for. Confirm the entry and outer door can open, close and latch without contact. Inspect screen retention and the operation of any glass or retractable panel.
Keep the model label readable and save the paperwork. If a screen tears later, that information can turn a vague replacement search into a precise parts request. The best order is the one you can verify and maintain after delivery.
Found a detail that needs checking? Tell us about a correction.