
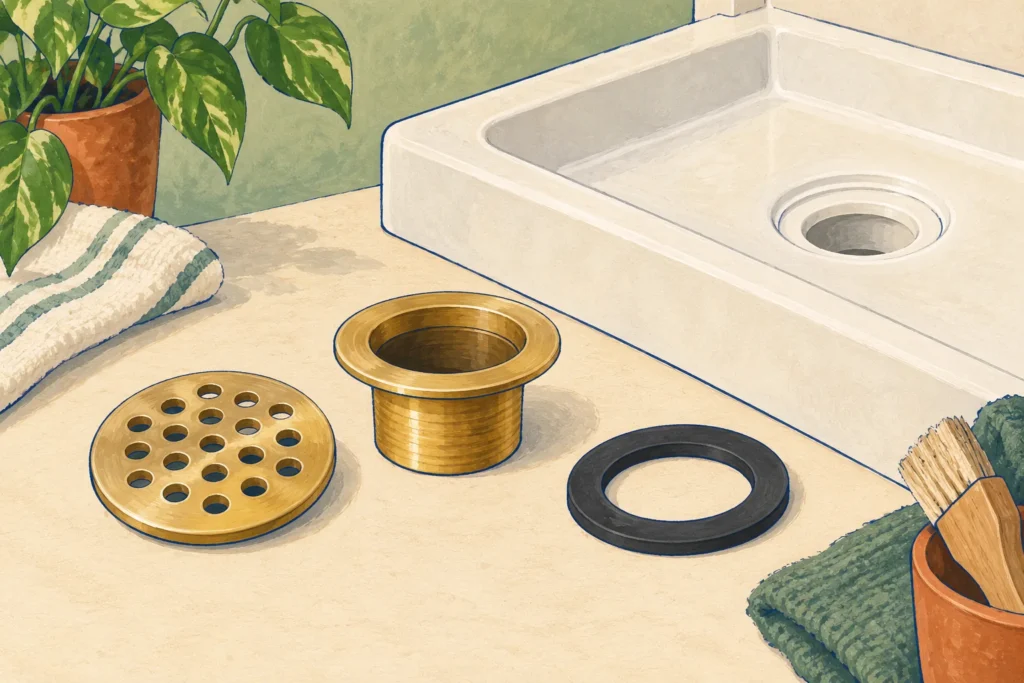
A mobile home shower drain can need a new cover, a matching seal, or a complete drain assembly. Those are different repairs. Identify the drain body, shower base and pipe connection before loosening anything or ordering a replacement.
A shiny strainer tells you little about what seals beneath it. Two drains with similar covers can attach to different pipes and need different access. The useful starting point is a dry inspection, followed by a fit record you can compare with actual instructions.
Identify the mobile home shower drain you actually have
Think of the drain as several separate parts. The cover catches larger debris and finishes the opening. The body passes through the shower base and connects it to the drainage piping.
The flange is the broad lip against the top of the base. Seals and mounting hardware below or inside the body do the work you cannot judge from the cover. The trap farther downstream is another component, with another set of connections.
| What you can identify | What it tells you | What it does not establish |
|---|---|---|
| Removable grille or strainer | How to reach debris and identify the body | Pipe size, seal condition or replacement body fit |
| Large locknut beneath the base | The body has mounting hardware that needs access | That turning the cover will release the body |
| Pipe surrounded by a compression gasket | A mechanical seal may connect pipe and body | That any rubber ring with a similar appearance fits |
| Threaded outlet with a tailpiece connection | A different connection must be matched below the base | That the assembly accepts the same pipe as a compression drain |
| Cracked base or movement around the opening | The shower base and its support need assessment | That a stronger drain or tighter nut will solve the problem |
Look for a maker name, model marking and the shower base label. Photograph the top and any existing access below. Keep the cover in the picture for identification, but don’t use its diameter as your pipe measurement.
The broader mobile home plumbing guide explains how drainage differs from the water supply. A drip under the shower can belong to either system. Establish which part is wet before calling it a drain failure.
Choose the repair by the failure, not the appearance
A damaged cover can be a small repair
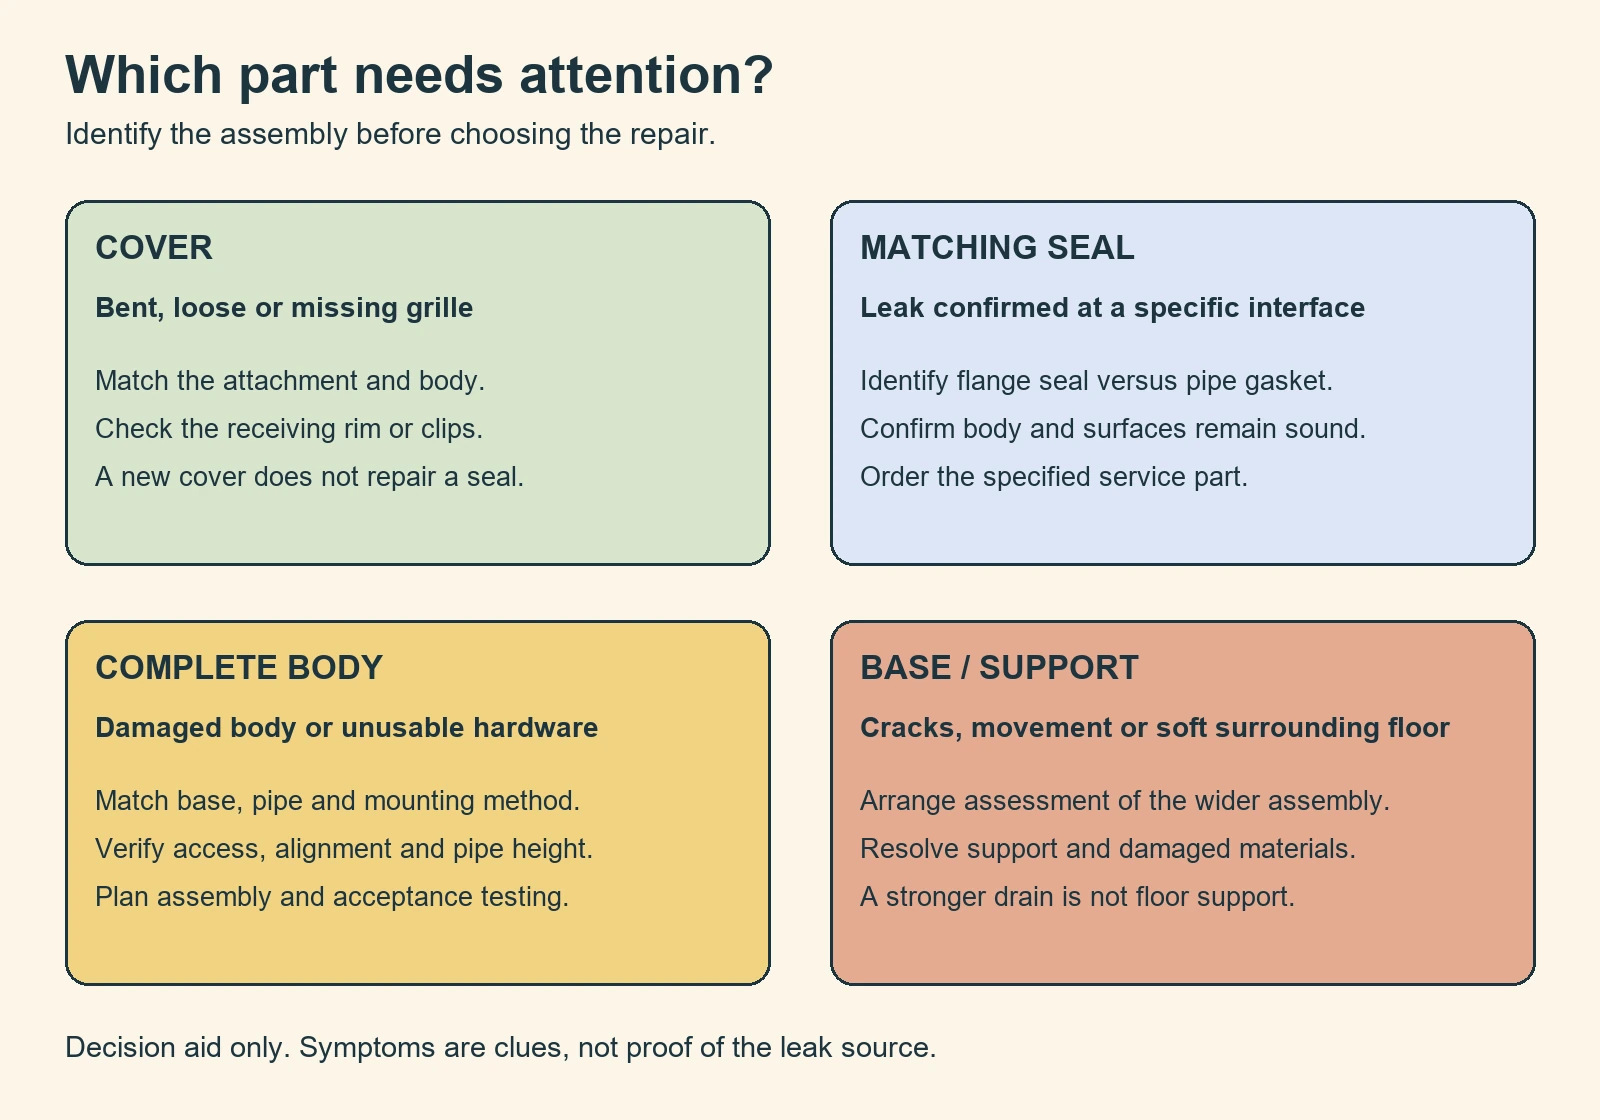
If the cover is bent, missing or loose, start with its attachment. Some covers snap into a matching body; others use screws or a threaded fitting. Buy the replacement for that body rather than assuming every round cover is interchangeable.
Record the cover diameter, attachment style and any screw spacing. Check the receiving rim or clips for damage too. A correct new cover won’t stay secure if the part holding it has broken.
For removal, follow the identified cover’s instructions. Remove visible retaining screws when that is its design. Do not pry hard against the shower base or turn an unidentified assembly with pliers.
If the body starts turning with the cover, stop. You may be disturbing the mounting or pipe connection. At that point, access and identification matter more than getting the grille out quickly.
Slow drainage does not automatically mean a bad drain body
Visible hair beneath a removable cover is a different problem from a cracked fitting. Clear accessible debris using the maker’s care directions, then assess the result. Do not dismantle a sound assembly merely because water drains slowly.
Note whether only the shower is slow or other fixtures also react. Record any gurgling, backup or water appearing when another fixture drains. Those observations help a plumber decide whether to investigate beyond the shower connection.
A replacement strainer cannot clear a restriction farther along the drainage system. Changing the whole drain without identifying the restriction may leave the original symptom. Keep drainage behavior separate from evidence of an actual leak.
A leak needs its first wet point identified
Water can travel before it drips. A wet locknut does not prove the locknut itself is the source. Look for the first wet edge from a safe, existing access point while avoiding contact with contaminated water.
Useful observations include moisture at the flange, around the pipe gasket, at a lower connection, or outside the base altogether. Report whether the leak happens during use, afterward, or without the shower running. These are clues, not proof of a particular failed part.
Stop using a shower that is leaking into the floor. If water continues with the shower off, include supply piping in the investigation. The water shutoff guide helps locate isolation when a supply leak is involved.
For a confirmed drain leak, the repair might be a specified gasket, a properly remade flange seal, or a complete body replacement. That choice depends on the condition of the mating surfaces and hardware. Smearing silicone over the visible rim is not evidence that the concealed joint has been repaired.
Make a fit record before ordering parts
Use one page of notes for the base, body and pipe. Keep unknown dimensions marked unknown until you can verify them. An incomplete record is a reason to ask for identification help, not a reason to choose the most familiar looking kit.
| Record | How to describe it | Why it changes the choice |
|---|---|---|
| Base identity and material | Maker, model and complete construction where available | Controls the drain interface, support and permitted sealant |
| Base opening | Actual opening and recess dimensions, when accessible | Must match the body and flange seating surface |
| Existing body | Markings, mounting method and condition | Determines whether a service part is available |
| Pipe | Material, markings and outside diameter | Determines the connection or compression gasket |
| Vertical position | Pipe top relative to the reference in the exact instructions | Affects whether the specified seal can engage correctly |
| Alignment | Whether the pipe and body meet without being forced | A fitting should not be used to pull the piping into place |
| Access and clearance | View of the lower hardware and room for tools | Can determine whether the base must be removed |
| Base and floor condition | Cracks, movement, staining or soft areas | May change a drain repair into a larger assessment |
Do not remove a working drain simply to fill every box. Begin with labels, records and accessible measurements. If disassembly is required, plan the replacement, access and testing before taking the shower out of service.
A nominal pipe label is not a promise that its outside diameter measures that same number. Match the pipe standard and actual connection requirements. Also keep pipe size, base opening and cover diameter in separate boxes.
For example, a cover described as roughly four inches across does not identify a four inch waste pipe. It may cover a much smaller connection. Selecting a drain from that top measurement alone skips the part that must actually seal.
This is the same distinction behind checking parts by their specifications. A mobile home label can help you find candidates. It cannot replace the fit record.
Compression drains and threaded outlets need different matches
A compression drain seals around a specified pipe using its matching gasket and tightening mechanism. A threaded outlet assembly connects through its own specified outlet and tailpiece arrangement. Similar top flanges do not make those connections interchangeable.
A useful counterexample is the manufacturer’s RVP054 sink and shower strainer assembly. It specifies a 1 1/2 inch threaded outlet and tailpiece connection. That is not the same connection as a gasket compressed around a vertical pipe.
That example establishes a distinction, not a recommendation for your shower. The page also lists multiple opening descriptions. Resolve the exact base opening and assembly drawing before treating a broad fit description as approval.
Never stack unrelated washers until a joint feels tight. A washer’s shape, material and intended position matter as much as its rough diameter. If you retain the existing body, order the service part identified for it.
A threaded body also does not mean every visible thread needs tape. Some threaded hardware compresses a washer rather than forming the water seal itself. Follow the particular connection’s instructions instead of putting sealant on every thread you see.
When Oatey 42150 is a relevant example
Oatey 42150 is a cast brass drain for a compatible preformed shower base. Its supplied compression gasket is specified around 2 inch Schedule 40 DWV pipe. DWV means drain, waste and vent.
The manufacturer’s 42150 selector and technical resources identify the brass model by part number and UPC 038753421506. The page’s generic heading says plastic. Check the selected variation rather than relying on that heading.
This is a conditional fit example, not a universal mobile home shower drain. You still need the correct base opening, recess, pipe geometry and access. A compatible pipe alone does not settle those other requirements.
The family has separate gasket options for some other pipe sizes and materials. That does not make the supplied gasket universal. Do not adapt an unidentified small or thin pipe by packing the gap with sealant.
It also isn’t a tile shower drain selected around a waterproofing membrane. A preformed base drain and a tiled shower’s waterproofing connection serve different assemblies. Match the drain to the shower construction before comparing finishes or materials.
Brass can be a reasonable material choice within the right assembly. It cannot restore a cracked base, provide missing floor support or move a misplaced pipe. Those faults remain even if the replacement body feels more substantial.
No caulk does not mean no flange seal
The name describes the mechanical pipe connection. It does not mean that water can be allowed between the flange and the shower base. Keep the pipe seal and base seal distinct when reading instructions.
The compression gasket around the pipe is one interface. The flange, specified bedding material, lower washers and mounting hardware form another. A new pipe gasket will not automatically repair a failed flange seal.
Sealant selection depends on every material it touches, including the base. A brass drain does not make plumber’s putty suitable for an ABS base. An acrylic surface can also be part of a construction that contains ABS beneath it.
The current Oatey putty compatibility guidance excludes ABS and ABS containing bases, including acrylic capped ABS. It calls for 100% silicone for ABS applications. Confirm compatibility with the base and drain instructions before assembly.
Do not assume stain free putty removes that restriction. Its purpose does not make it universally compatible with plastics. If the material or instructions are unclear, obtain the base maker’s written direction before choosing the bedding product.
When silicone is required, its cure time belongs in the repair plan. Follow the specific sealant’s instructions before exposing it to water. Adding silicone over old putty without remaking the joint is not the same as bedding a clean, prepared flange.
Plan removal and replacement around real access
Before a complete mobile home shower drain replacement, determine what can be reached below the base. Access through skirting is not proof that the drain’s mounting hardware is accessible. Flooring, the belly enclosure and the base itself can stand between you and the connection.
Use an existing service opening when available. If reaching the drain requires cutting flooring or disturbing unknown materials, arrange an assessment. Do not remove framing, supports or other building components to gain wrench clearance.
For a body secured by a large nut beneath the base, that nut needs a workable installation route. Being able to tighten the pipe gasket from above does not make the entire body replaceable from above. Establish which fastener each instruction is describing.
Once the assembly is identified, organize the work in this order:
- Confirm the repair boundary: cover, service seal, complete drain, or base and floor work.
- Identify the exact parts and obtain their instructions before disconnecting the existing assembly.
- Confirm access, pipe alignment and the condition of the base’s sealing surfaces.
- Compare the proposed body with the fit record, including the lower hardware and gasket.
- Follow the specified assembly sequence, base support instructions and material compatibility limits.
- Complete the required cure and leak checks before closing the access.
This sequence is a planning aid, not a substitute for the drain manual. Glued, compression and threaded connections need different work. If removal starts twisting connected piping, stop rather than using the pipe as a handle.
Pipe height needs a stated reference
A pipe can be the right diameter and still sit too high or too low. Compare its top with the reference surface in the exact drain instructions. A measurement from the subfloor is not interchangeable with one from the installed flange.
Set the base position and support as specified before establishing final geometry. Changing the base elevation changes the relationship to the pipe. Do not copy another model’s cut height or cut first and hope a thicker gasket compensates.
If the pipe is short, tilted or off center, have that condition corrected through an appropriate connection plan. Pulling the drain sideways to meet it transfers the mismatch into the seal. A successful fit should not depend on forcing the base or piping into position.
Test the repaired connection before hiding it
A brief run of water can reveal an obvious leak, but it does not replace the specified acceptance test. Use the instructions applicable to the drain and base. Coordinate those requirements with the sealant’s cure period.
If a test calls for blocking the drain, use the specified testing equipment and procedure. Do not improvise a loose object that could disappear into the pipe. Avoid filling a damaged or uncertain base merely to see what happens.
During an appropriate test, inspect the flange area, pipe connection and any disturbed downstream joint from the available access. Record the result before restoring the enclosure. Water appearing elsewhere still needs tracing; it isn’t proof that tightening the drain again is the answer.
Keep the model numbers, photos and test notes with your home records. They make the next service call more useful and prevent repeating the identification work. If the floor was wet, address the affected materials before concealing the area.
The bathroom repair planning guide helps coordinate that wider work. A drain repair is complete when the correct connection is secure and verified. A hidden damp floor should not become the price of getting the shower back quickly.
Questions that change the next step
Can I replace only the rubber gasket?
Sometimes, if the body and mating surfaces remain sound and the maker identifies a matching replacement gasket. Identify which gasket has failed first. A pipe gasket and the washer beneath a base have different jobs.
Is every mobile home shower drain 1 1/2 inches?
No single dimension should be assumed for every home. Threaded tailpiece assemblies and drains around 2 inch DWV pipe are documented examples of different connections. Measure and identify yours rather than choosing by the home’s age.
Can a complete drain fix a flexible shower floor?
A drain is not the base’s support system. Have unexplained movement, cracking or a soft surrounding floor assessed before treating the seal as the only problem. Repeated tightening does not establish that the underlying assembly is sound.
What should I send a plumber or parts supplier?
Send the base label, drain markings, top and underside photos, and your fit record. Describe the first wet point or the drainage symptom separately. Ask them to confirm the proposed body, gasket, sealant and access route for that specific assembly.
Found a detail that needs checking? Tell us about a correction.